profile image

Parth Thakkar

Embedded and Backend Dev \n;

About Me

Hi there! I'm an MS student at CU Boulder, and I've been tinkering with embedded systems for the past four years, I have been learning embedded development for 4 years I've had the opportunity to work on various projects that involved creating drivers for different communication protocols like BLE, PS2, and USB. I excel in problem-solving and have a strong foundation in embedded systems and real-time operating systems. Currently, I am expanding my knowledge in the domain of low-power embedded systems to create energy-efficient solutions.

I have developed software projects that address real-world challenges by employing a logical and systematic programming approach. I have actively participated in hackathons and hardware-related ideathons.

At the end of the day, I'm just a guy who loves to understand how things work.

Work Experience

  • All
  • Hardware
  • Software

Embedded Developer, Intern - Griden Power - An EV Charger Company (Sept 2022 - May 2023)

As an firmware and hardware developer I have designed IoT part of charger from entirely from the ground up

  • designed the printed circuit boards (PCBs) and contributed to the manufacturing process of the chargers
  • Managed and hosted servers within the AWS (Amazon Web Services) environment. Additionally, I established communication between the chargers and the AWS server using the OCPP and MQTT protocols
  • Developed custom drivers to integrate with other peripherals like touch LCD, Neoway GSM/GPS module

Establish wireless communication between multiple ESPs to keep track of people counter that communicates with cloud, to help in Hygiene Monitor at Airports

Firmware Developer, Intern - Scan point geomatics - Indian Geomatics Comapy (Oct 2022 - August 2023)

Helped in developing a driver for a custom UHF-RFID board, enabling it to effectively read and write RFIDs over extended distances

  • Enhanced the driver by incorporating algorithms that improved its overall performance
  • Designed and Manufactured full fledge product, including PCB and 3D printing
  • Worked on Custom UHF reader, ESP32, Touch screen

Python Developer - (2021)

I have developed a market making bot for the cryptocurrency CITRUS, utilizing the programming language Python, with the purpose of stabilizing the coin's market by providing liquidity and mitigating volatility.

Also developed fronted to manage the configuration and managing the cryprobot to stay within the specified range.

Hardware Team - Club Robocon (March 2019 - Sept 2019)

I created baremetal drivers for robot that represented LD college in DD robocon India

  • developed drivers for atmega328p for example: I2C, UART, SPI, Rotery Encoder, PID/Motor Driver, USB, LCD
  • Worked on different boards and softwares like stm32 and rpi and simulated path that will robot take in the compitition in MATLAB, calculated PID for motor in MATLAB
  • techstack: Microchip Studio, Proteus, Matlab

Backend Developer - Lakshya Fest 2020, LDCE (2019 - 2020)

I have successfully created and implemented swift API routes for Lakshya Techfest 2020. This included deploying and thoroughly testing the website to ensure it functioned optimally.

The website was developed utilizing the Django framework, which enabled me to construct the backend in a way that provided API routes for the frontend, allowing for seamless communication and functionality.

Back-end Developer - Purple & Cream (2019)

I have designed and developed a website that is similar to Stackoverflow, but made for the film industry. The website allows users to ask and answer questions related to the film industry, as well as share knowledge and resources. The website also includes features such as voting, commenting, and user profiles sending chats to other users.

After the completion of the website design and development, I successfully deployed the website on the web.

My Projects

  • All
  • Hardware
  • Software
Pong game

Pong game with 8051 in Asseembly

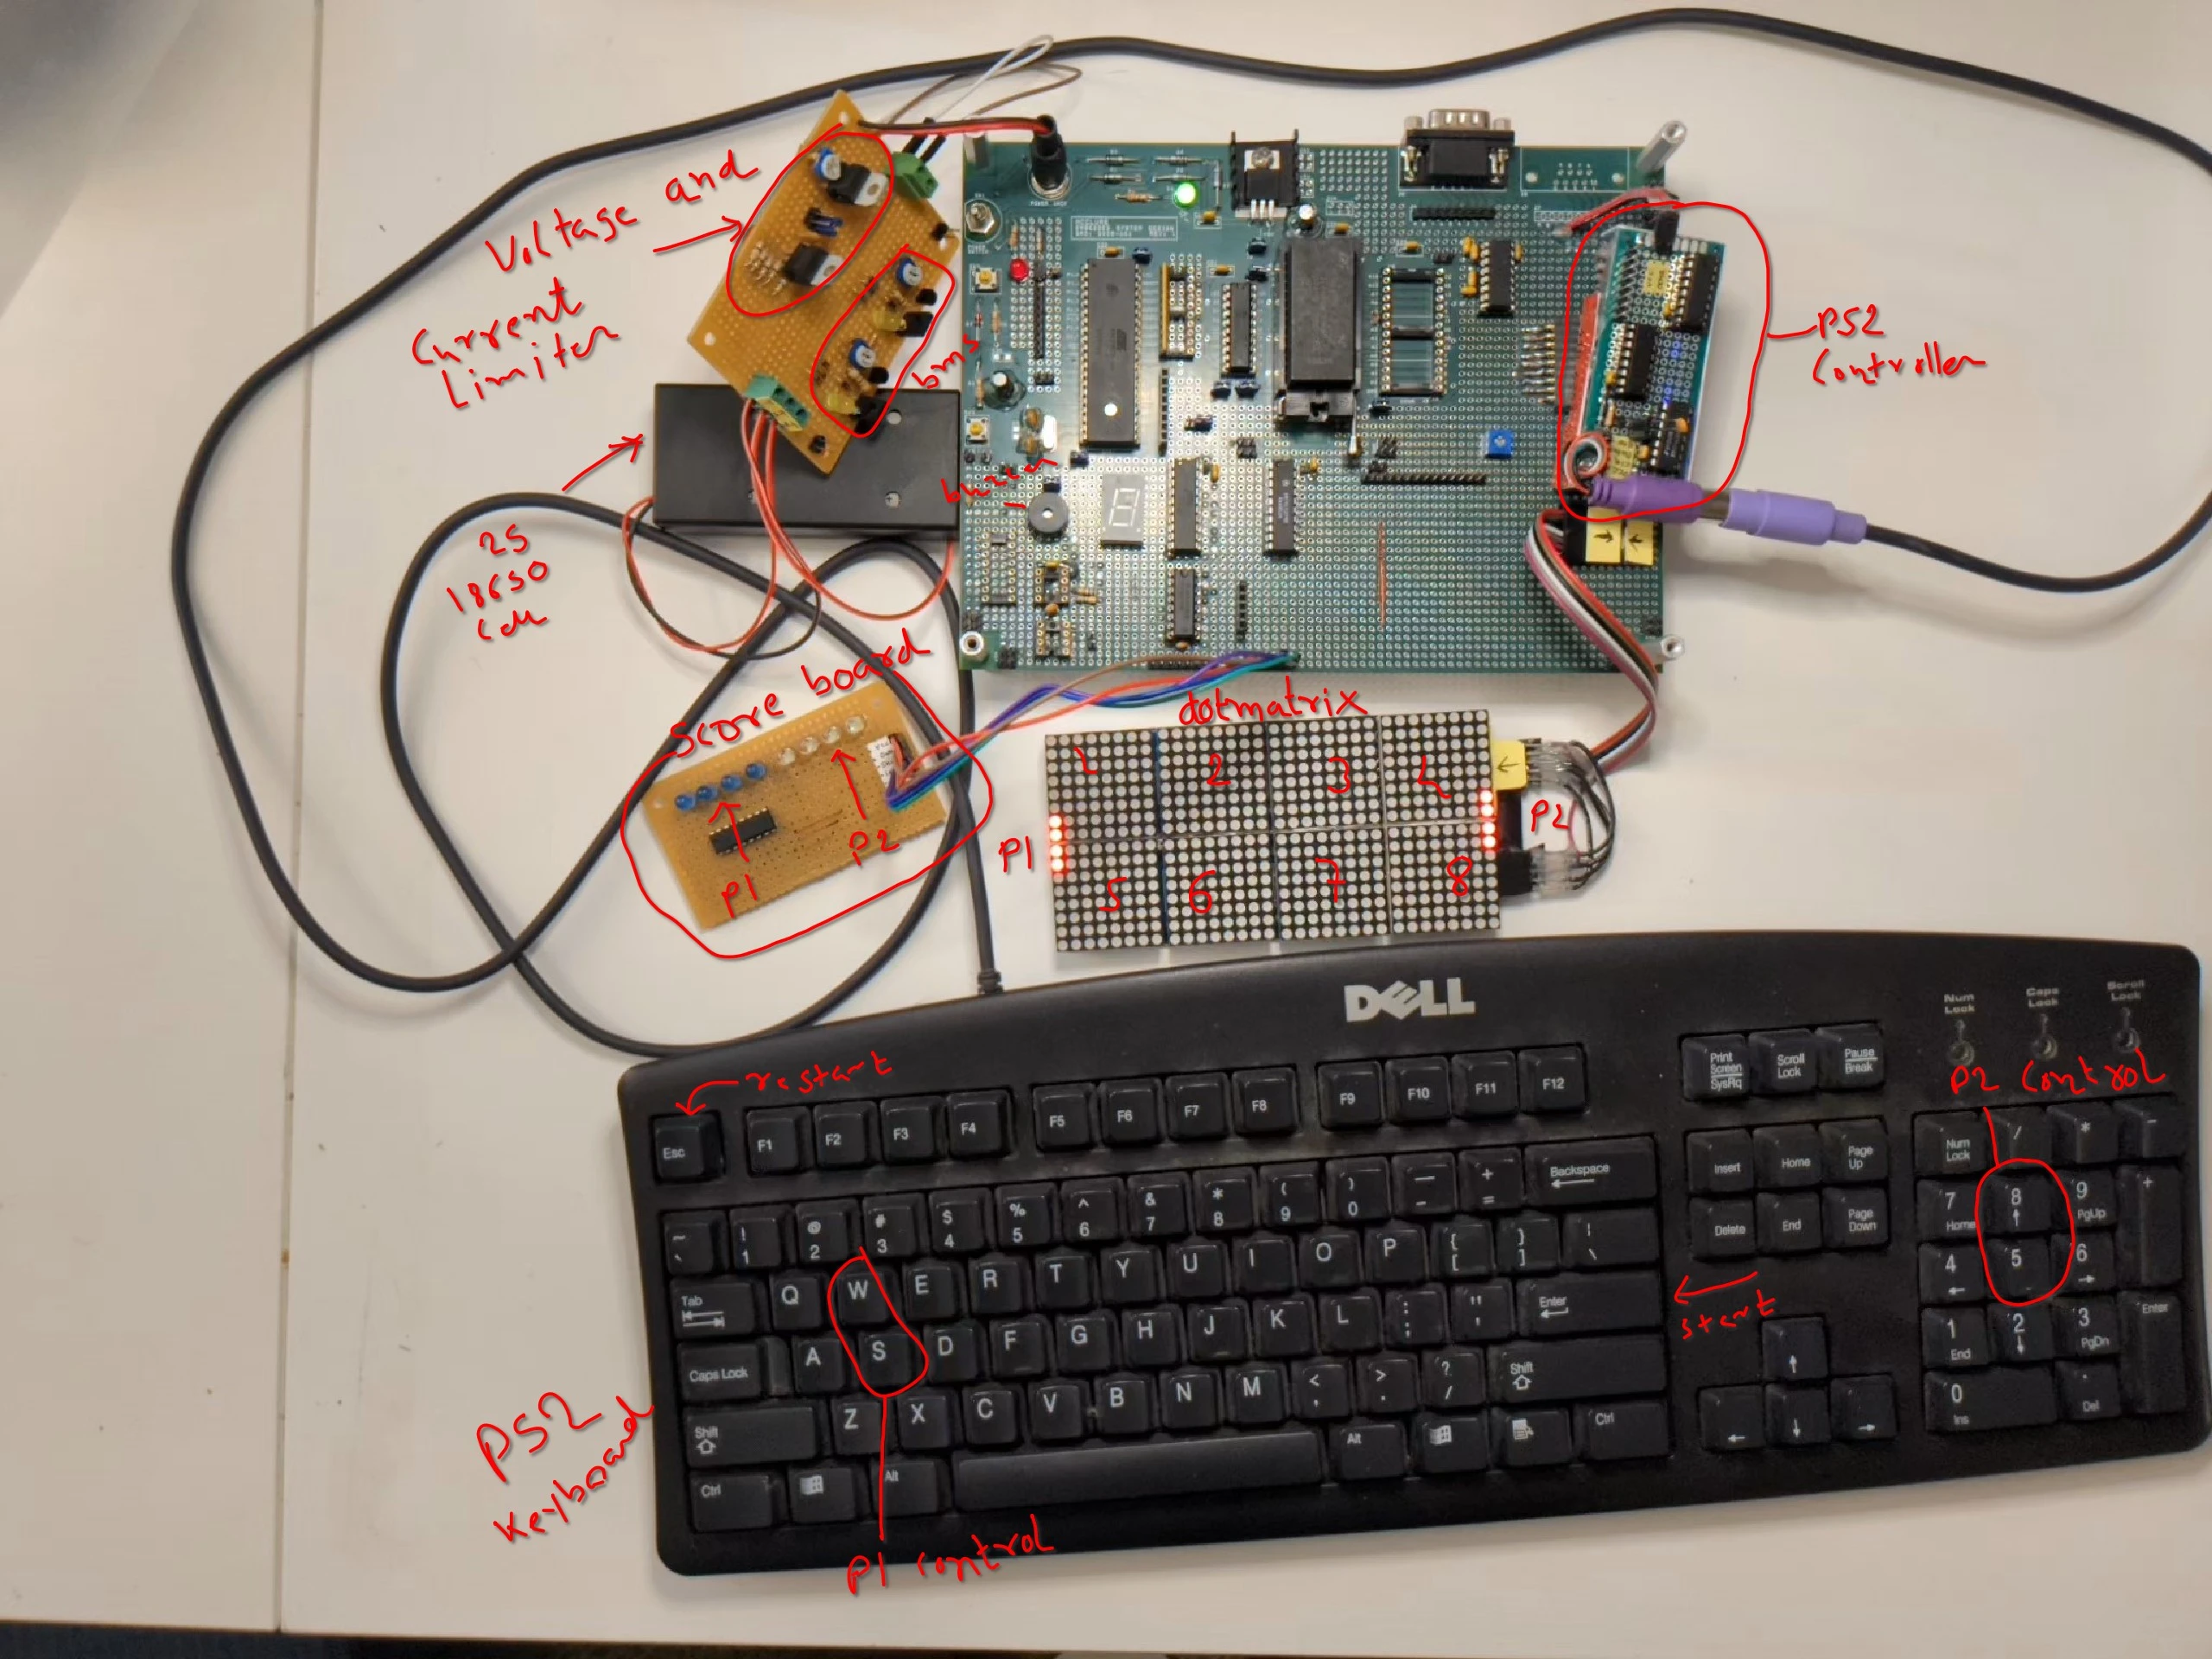
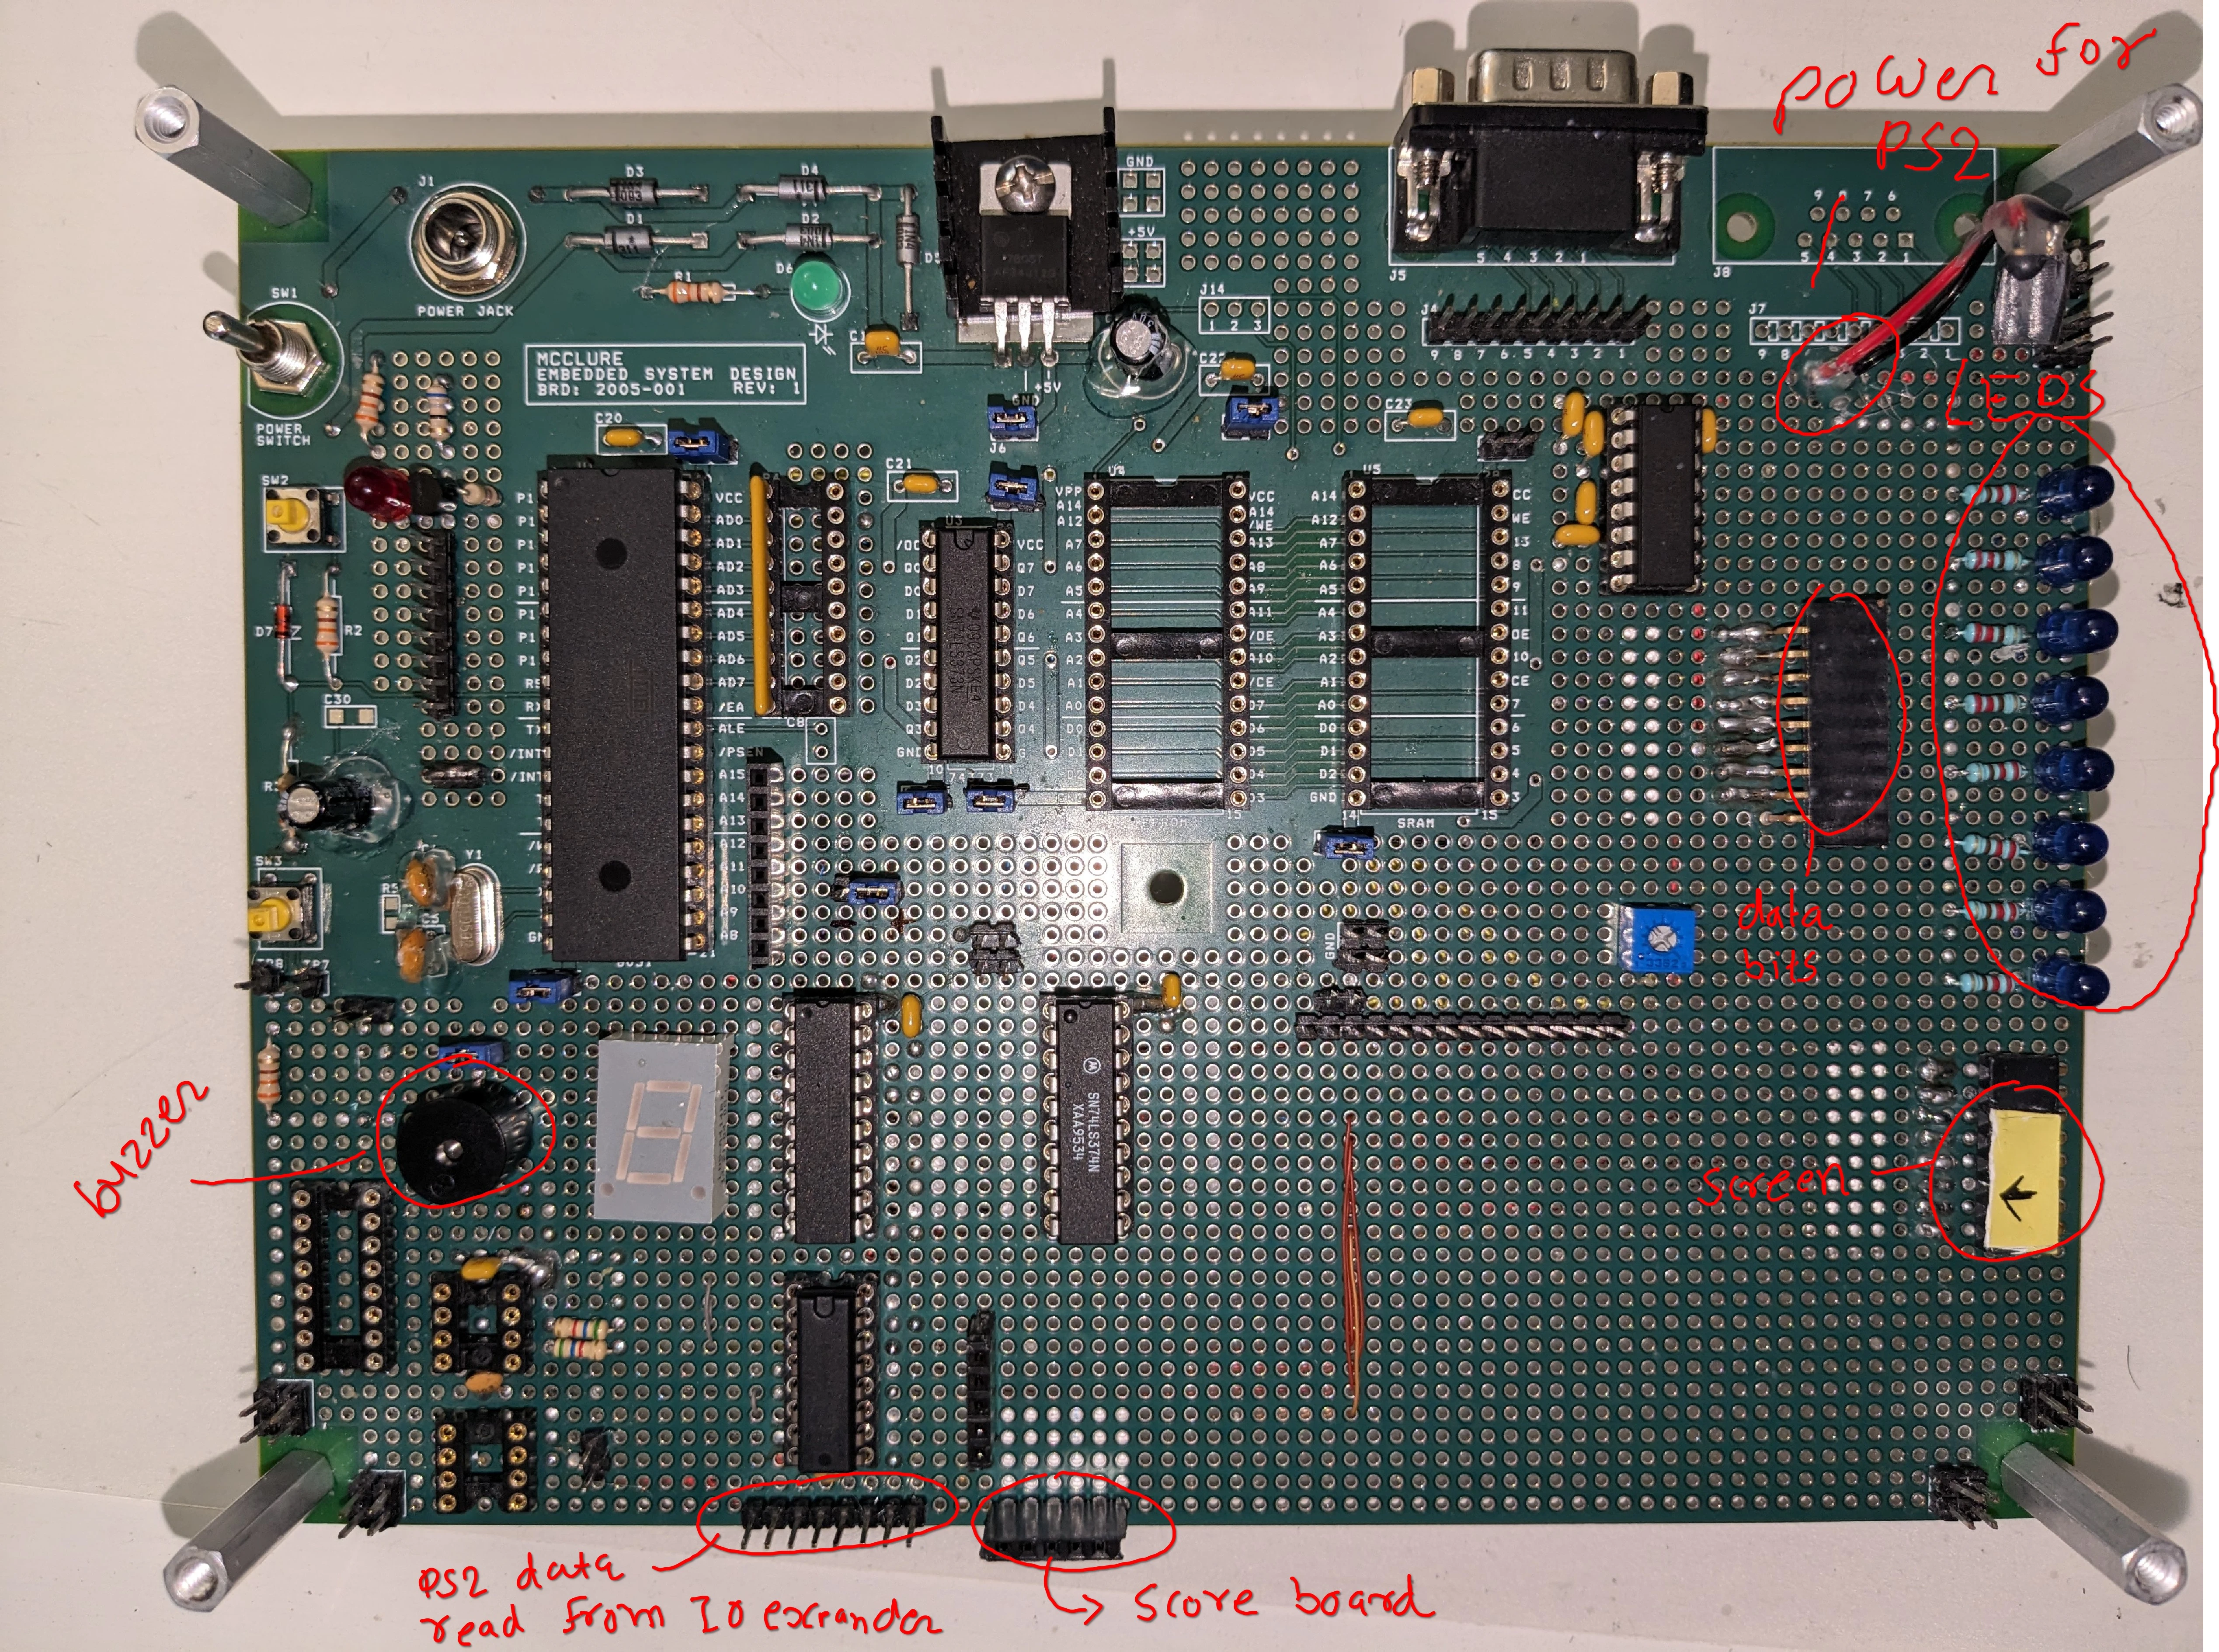
Designed an pong game system using the 8051 microcontroller, featuring a 16x32 pixel dot matrix display composed of eight 8x8 units. Integrated a custom PS2 controller interface using shift registers and an IO expander. Developed a scoring mechanism with shift registers driving an LED scoreboard. Programmed game logic in assembly language, made algorithms for paddle movement, ball dynamics, and collision detection. Added dynamic ball movement to increase game challenge over time. Also designed a Battery Management System using a reference Zener diode and LM317 for voltage and current regulation.

This project presents the design and implementation of an interactive game system based on the 8051 microcontroller. Central to the system is a 16x32-resolution dot matrix display, constructed from eight individual 8x8 dot matrix units to form a 16x32 pixel display area. This display serves as the primary interface for the game, showcasing dynamic visual elements and game interactions.

The system incorporates a PS2 controller with a custom-designed hardware interface. which uses shiftresgisters to store the data and Interrupt unit which send interrupt when reading of 33bits are completed by hardware then the PS2 hardware sends data through IO expander and This interface leverages the interrupt capabilities of the 8051 microcontroller, ensuring real-time responsiveness and input recognition. The interface efficiently handles data latching from the controller, translating player actions into on-screen movements seamlessly.

The scoring mechanism, made through the use of shift registers. These registers drive an LED-based scoreboard, providing players with a visual feedback of their performance in the game.

The game logic, developed in assembly language, includes algorithms for paddle movement and ball dynamics. It ensures that the gameplay is adhering to the physical constraints of the dot matrix display. Collision detection algorithms are implemented to facilitate interactions between the ball and paddles, also I have added some dynamicity to the game by adding faster ball movement after some amount of time to make game challanging.

I have also designed BMS with help of reference zener diode and some LM317 for voltage and current regulation.

See some Work I've Done..!

View Code


RTOS baremetal

Face Shooter using Posix and Rate Monotonic scheduler

Developed a custom Real-Time Operating System (RTOS) for STM32F0711 (ARM Cortex M0+ architecture), featuring Round Robin, Cooperative, and Periodic scheduling methodologies. Implemented mutexes for resource management and a SysTick handler for precise task switching. Utilized ARM assembly for efficient context switching, preserving task state integrity. Managed task stack space to prevent overflows, ensuring reliable task execution. Demonstrated expertise in low-level programming, real-time concepts, and flexible task scheduling for diverse real-time applications.

In this project, I developed a custom bare-metal RTOS made for the STM32F0711 board, which is based on the ARM Cortex M0+ architecture. This RTOS was implemented in three distinct scheduling methodologies: Round Robin, Cooperative, and Periodic Scheduler. Each of these implementations caters to different operational requirements.

Round Robin Scheduling: In this mode, the RTOS allocates a fixed time slice to each task, rotating through them in a cyclic order. This approach ensures fair CPU time distribution among all tasks, suitable for systems where tasks have similar priority levels.

Cooperative Scheduling: Under cooperative scheduling, tasks voluntarily yield control back to the scheduler, allowing other tasks to execute. This method provides more control to the individual tasks over their execution but requires well-designed task interaction to prevent issues like task starvation.

Periodic Scheduler: The periodic scheduler is designed for tasks that need to run at regular intervals. This implementation is particularly useful for time-sensitive tasks that require consistent and predictable execution timing.

Mutex Implementation: To manage access to shared resources, I have incorporated mutexes in the RTOS. These mutexes are essential for avoiding race conditions and ensuring data integrity when multiple tasks access the same resource.

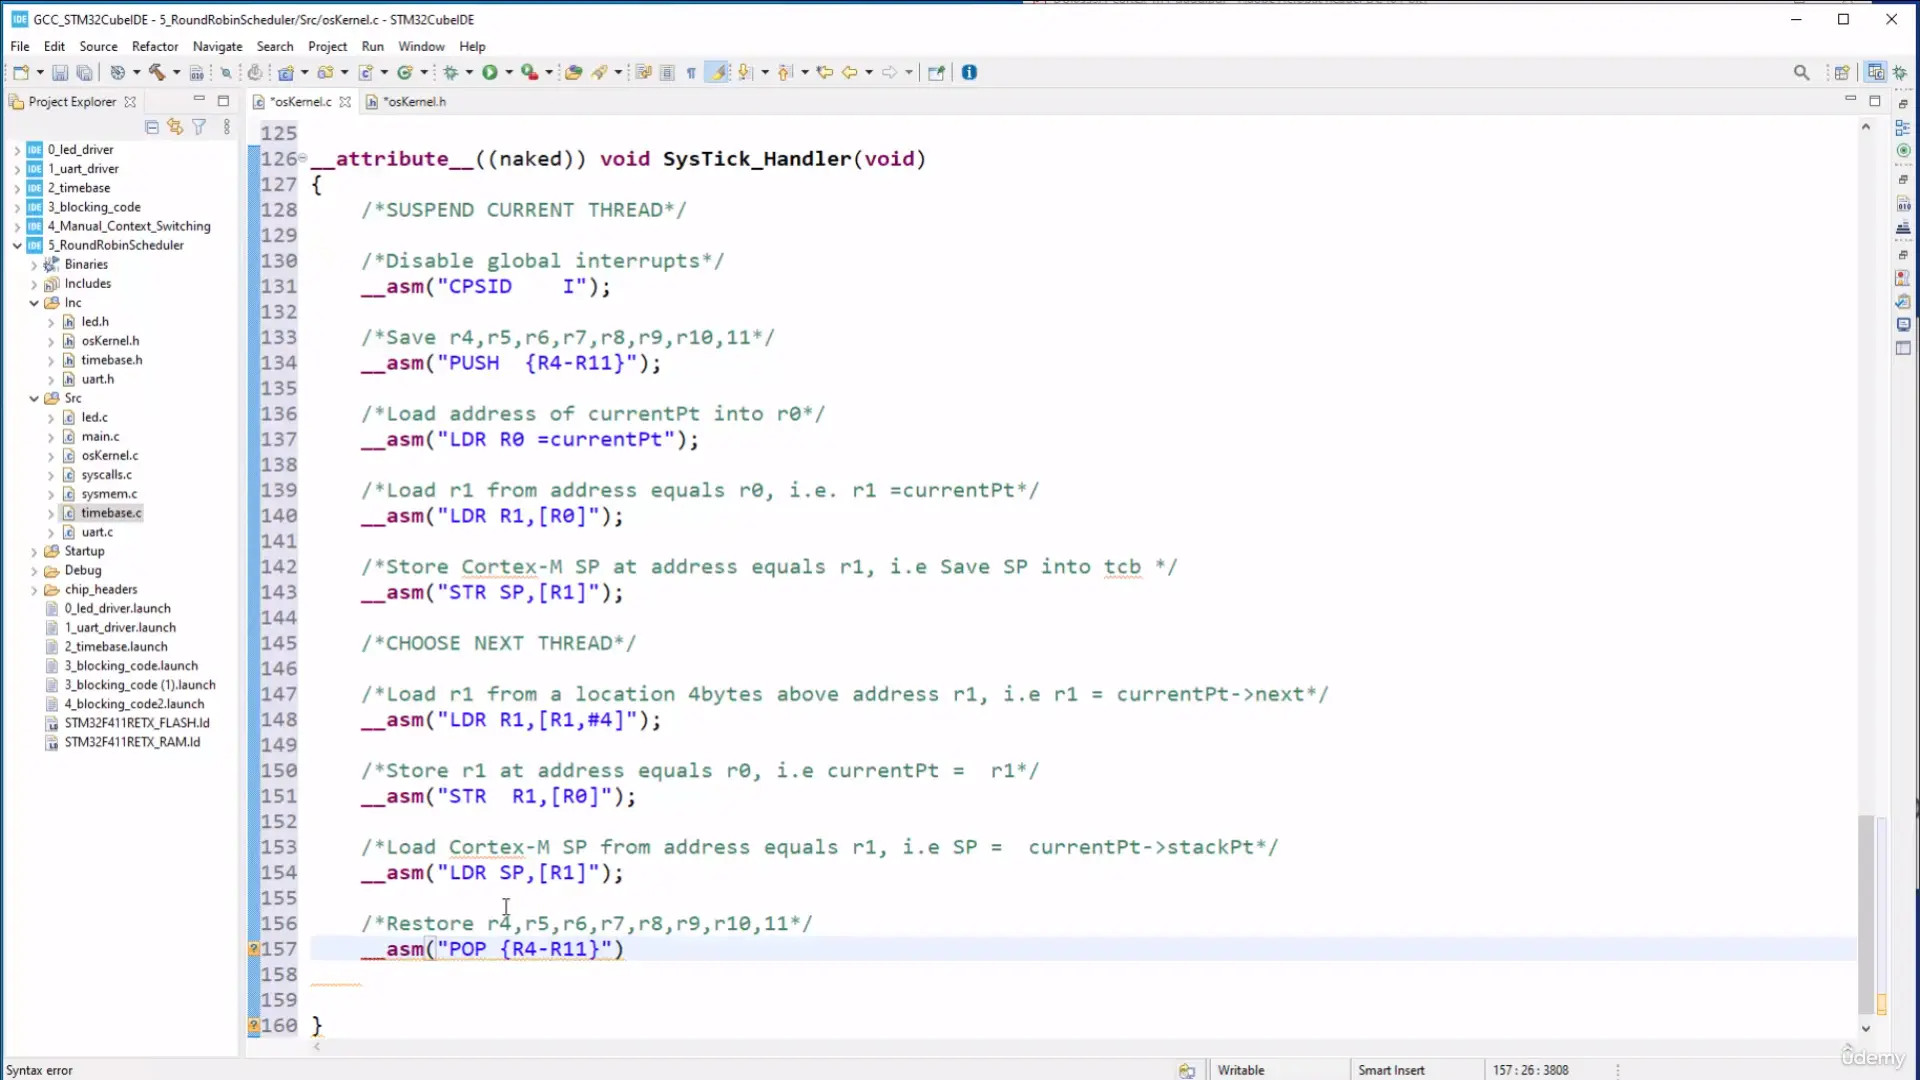
SysTick Handler for Task Switching: The core of the task management mechanism in this RTOS is the SysTick handler. This handler is responsible for task switching, leveraging the SysTick timer of the STM32F0711 board to trigger context switches at precise intervals.

Context Switching with ARM Assembly: One of the critical aspects of this RTOS is the efficient handling of context switching. This process involves saving the current state of a task and restoring the state of the next task to be executed. To accomplish this, I used ARM assembly to manipulate the stack and registers, ensuring that each task’s context is preserved and restored accurately. This approach is crucial for maintaining the integrity of task execution and allowing seamless switches between tasks.

Stack Management for Tasks: Alongside context switching, the RTOS also manages the stack space for each task. This management is vital to prevent stack overflows and to ensure that each task has sufficient stack memory for its execution.

View Software Code


RTOS baremetal

Huffman encoder Authentication system IoT

Developed a custom Real-Time Operating System (RTOS) for STM32F0711 (ARM Cortex M0+ architecture), featuring Round Robin, Cooperative, and Periodic scheduling methodologies. Implemented mutexes for resource management and a SysTick handler for precise task switching. Utilized ARM assembly for efficient context switching, preserving task state integrity. Managed task stack space to prevent overflows, ensuring reliable task execution. Demonstrated expertise in low-level programming, real-time concepts, and flexible task scheduling for diverse real-time applications.

Iot In this project, I developed a custom bare-metal RTOS made for the STM32F0711 board, which is based on the ARM Cortex M0+ architecture. This RTOS was implemented in three distinct scheduling methodologies: Round Robin, Cooperative, and Periodic Scheduler. Each of these implementations caters to different operational requirements.

Round Robin Scheduling: In this mode, the RTOS allocates a fixed time slice to each task, rotating through them in a cyclic order. This approach ensures fair CPU time distribution among all tasks, suitable for systems where tasks have similar priority levels.

Cooperative Scheduling: Under cooperative scheduling, tasks voluntarily yield control back to the scheduler, allowing other tasks to execute. This method provides more control to the individual tasks over their execution but requires well-designed task interaction to prevent issues like task starvation.

Periodic Scheduler: The periodic scheduler is designed for tasks that need to run at regular intervals. This implementation is particularly useful for time-sensitive tasks that require consistent and predictable execution timing.

Mutex Implementation: To manage access to shared resources, I have incorporated mutexes in the RTOS. These mutexes are essential for avoiding race conditions and ensuring data integrity when multiple tasks access the same resource.

SysTick Handler for Task Switching: The core of the task management mechanism in this RTOS is the SysTick handler. This handler is responsible for task switching, leveraging the SysTick timer of the STM32F0711 board to trigger context switches at precise intervals.

Context Switching with ARM Assembly: One of the critical aspects of this RTOS is the efficient handling of context switching. This process involves saving the current state of a task and restoring the state of the next task to be executed. To accomplish this, I used ARM assembly to manipulate the stack and registers, ensuring that each task’s context is preserved and restored accurately. This approach is crucial for maintaining the integrity of task execution and allowing seamless switches between tasks.

Stack Management for Tasks: Alongside context switching, the RTOS also manages the stack space for each task. This management is vital to prevent stack overflows and to ensure that each task has sufficient stack memory for its execution.

View Software Code


Pong game

Practical PCB Design Labs

  • In the practical PCB design labs, I gained hands-on experience in various aspects of electronic design and debugging. I learned about ground bounce, a phenomenon that can cause signal integrity issues, and explored techniques to minimize its impact. I performed measurements of inrush and steady-state currents, which are crucial for designing reliable power supply systems. I also worked on designing and implementing astable vibrators, a type of oscillator circuit.
  • Throughout the labs, I focused on creating multi-layer PCBs while adhering to acceptable EMI (Electromagnetic Interference) standards. I gained experience in reading and analyzing commercial boards, identifying sources of noise, and implementing strategies to reduce noise and improve overall performance.
  • Additionally, I delved into essentials for ensuring signal integrity in high-speed designs. I became proficient in using various debugging tools, such as oscilloscopes, logic analyzers, multimeters, and function generators, to troubleshoot and optimize hardware designs.

Atable multivibrator

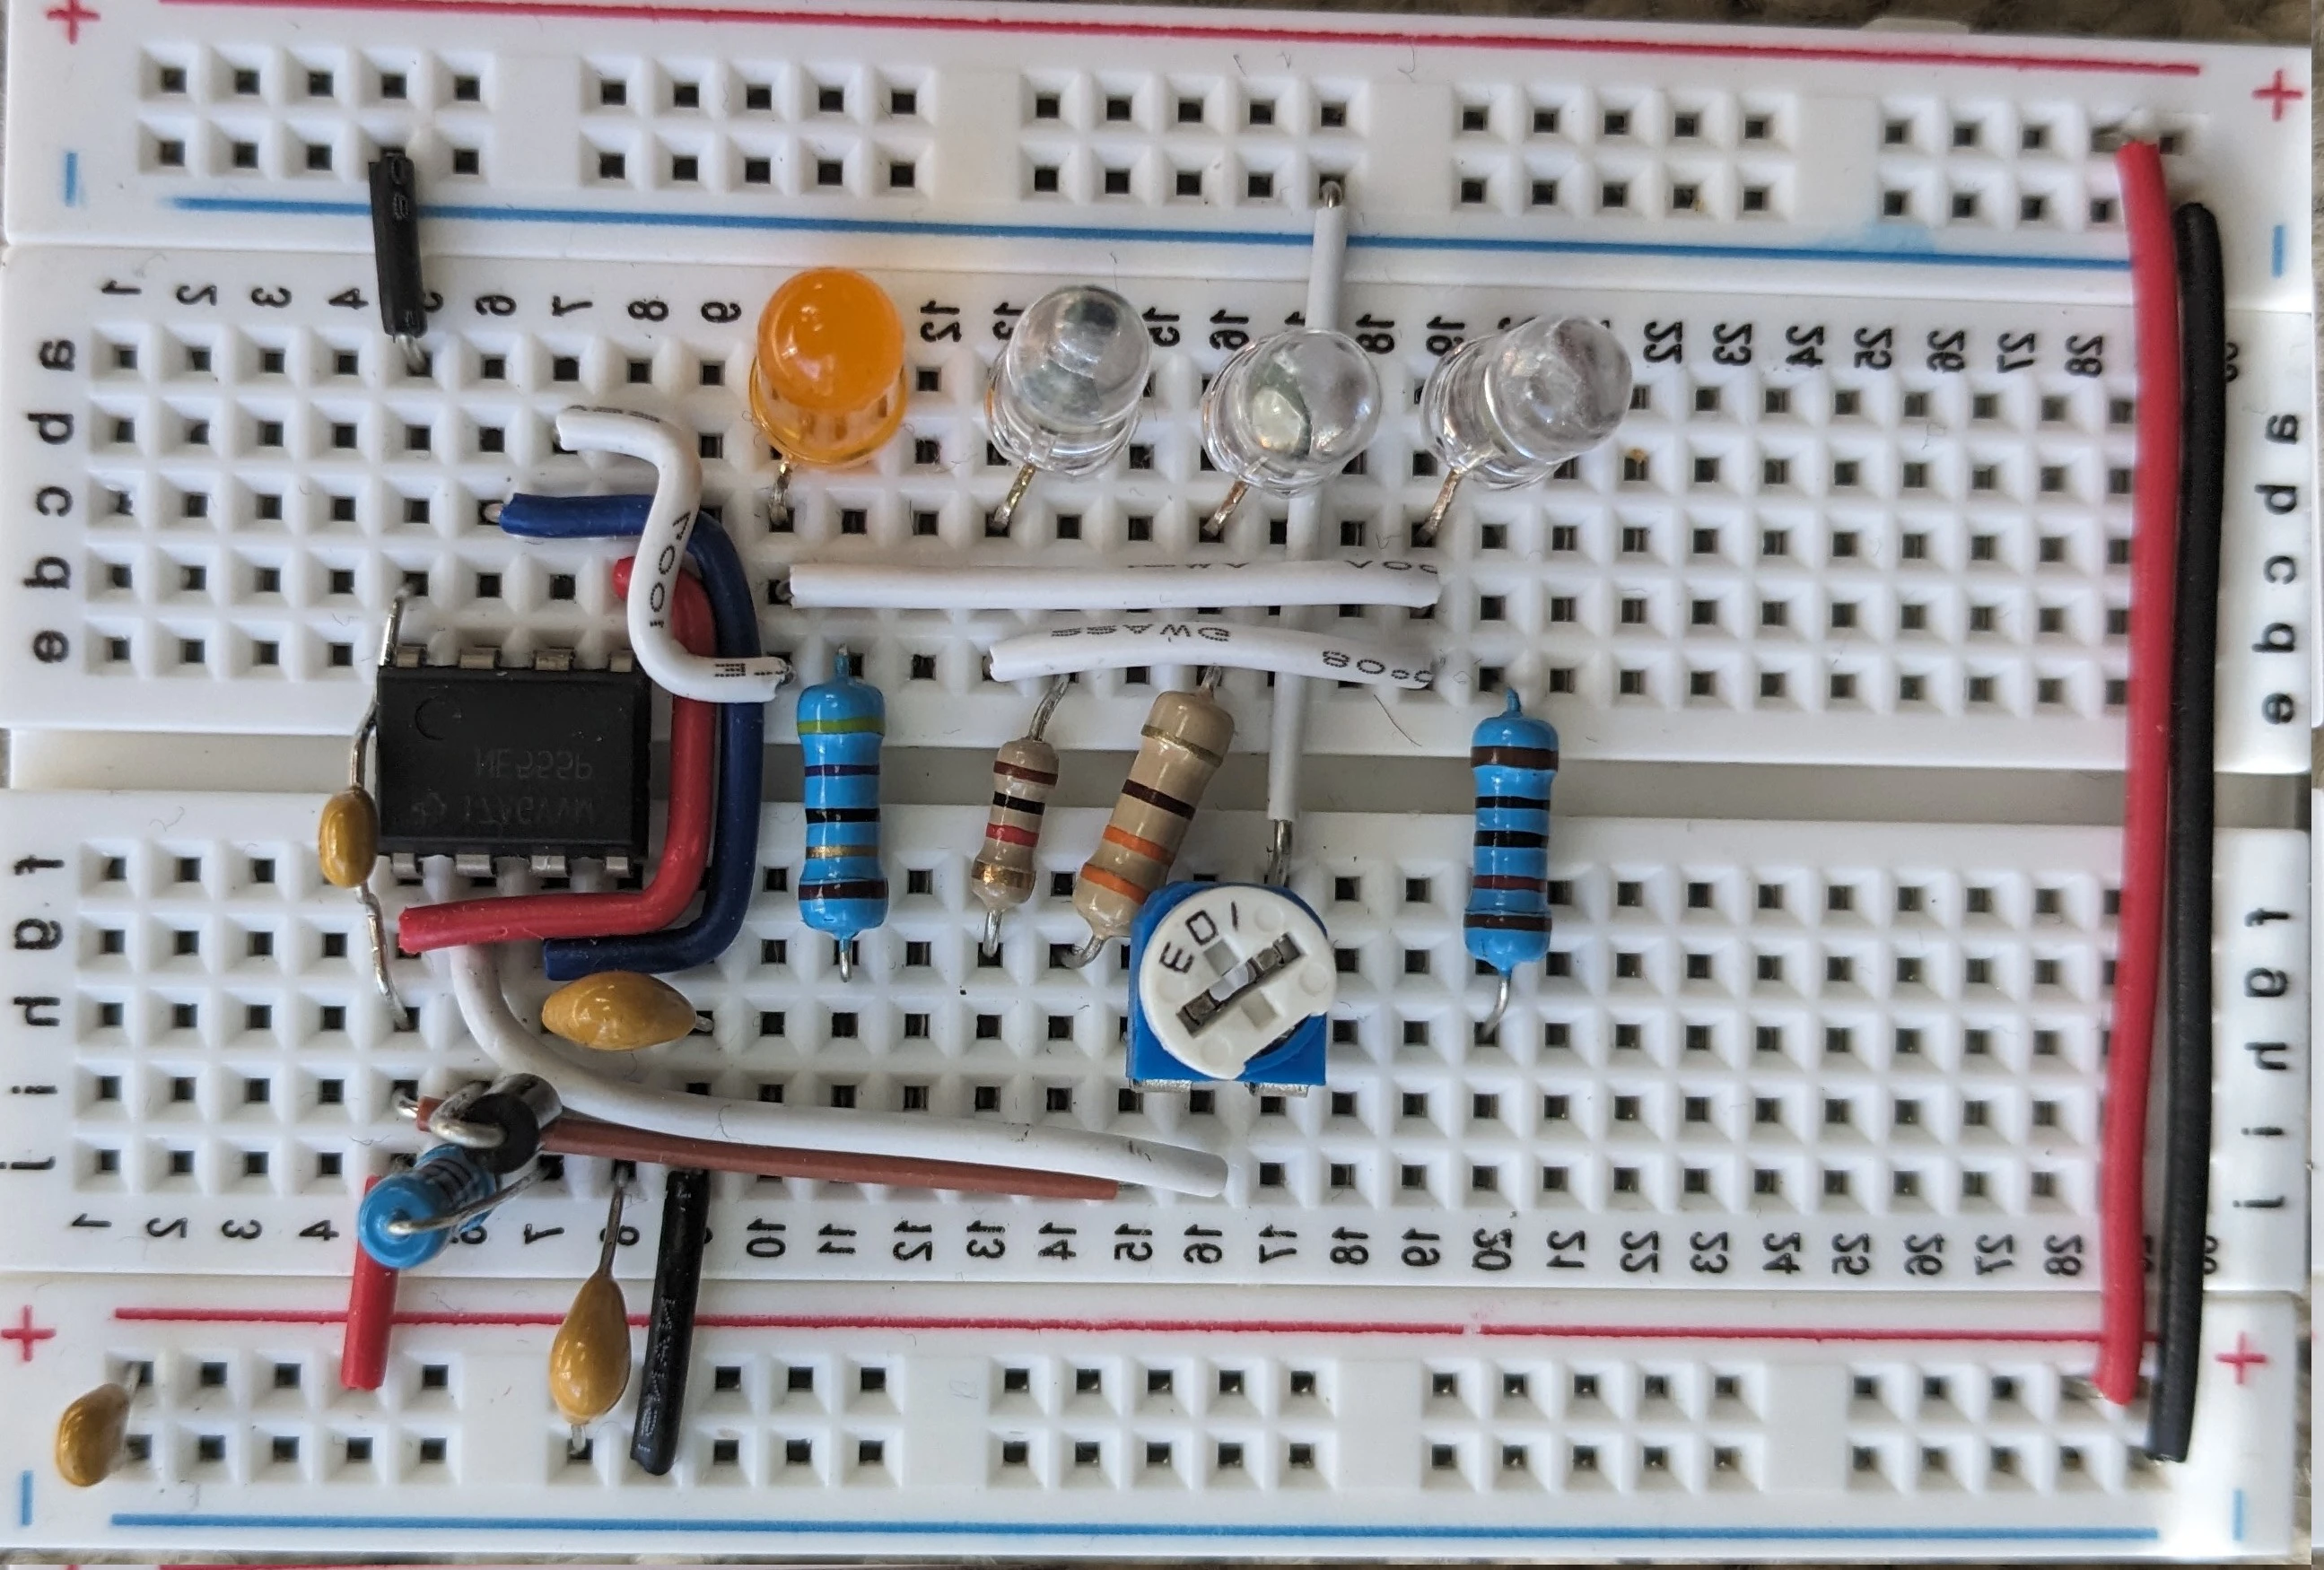
  • In this project, I designed and built a PCB featuring a 555 timer configured as an astable multivibrator. The primary goal was to create a circuit that could generate a slow, adjustable output signal with a target frequency of 500Hz and a 50% duty cycle. To achieve this, I incorporated a potentiometer to control the duty cycle, allowing for a range of approximately 10% to 90%. The circuit design also included strategically placed decoupling capacitors to minimize switching noise and ensure a stable power supply to the 555 timer IC.
  • Throughout the project, I conducted various measurements and analyses to assess the circuit's performance. I examined the output waveforms, rise and fall times, and noise levels using an oscilloscope. I also calculated the Thevenin resistance of the circuit by measuring voltages with and without a load resistance. I designed and learned valuable lessons in the process.
  • Link: Report and Photos

Good Design practices

  • In this project, I designed and developed a PCB that demonstrates the impact of good and bad layout practices on the performance of a circuit. The board features a 555 timer configured as an astable multivibrator, generating a 500 Hz signal with a 66% duty cycle. The 555 timer's output is connected to two hex inverter ICs, one laid out using good design practices and the other using suboptimal techniques.
  • The primary objective of this project was to analyze and compare the switching noise and signal integrity between the good and bad layouts. The good layout incorporated a continuous ground plane, short traces, and decoupling capacitors placed close to the ICs. In contrast, the bad layout lacked a ground plane, had longer traces, and placed the decoupling capacitors far from the ICs. Through measurements and analysis using an oscilloscope, I observed significant differences in noise levels and signal rise and fall times between the two layouts.
  • The project highlighted the importance of proper PCB layout techniques in minimizing noise and improving signal integrity. The good layout exhibited lower switching noise on both the "Quiet High" and "Quiet Low" pins compared to the bad layout. The rise and fall times of the signals were also faster in the good layout, indicating better signal quality. This project demonstrated my ability to design and analyze PCBs, understand the impact of layout on circuit performance, and apply best practices to mitigate noise and enhance signal integrity.
  • Link: Report and Photos

Golder Arduino

  • In this project, I designed and developed a custom Arduino-compatible board called the Golden Arduino, with the goal of improving performance, reducing noise, and enhancing features compared to commercial Arduino boards. The project involved careful consideration of schematic design, component selection, and PCB layout optimization to achieve the desired objectives.
  • The Golden Arduino board demonstrated reliable functionality across various aspects, including continuous ground plane, same form factor as commercial Arduino(little smaller infact), short return path via vias close to switching pins , power supply stability, Analog reference stability, boot-loading capability, code execution, and communication interfaces such as ICSP programming, serial communication, I2C, SPI, analog input, and digital output. Significant noise reduction, ranging from 10% to 20%, was observed compared to commercial Arduino boards, highlighting the effectiveness of the design techniques employed, such as proper component placement, ground plane optimization, and decoupling capacitor usage.
  • Link: Report and Photos

Instrument Droid

  • In this project, I designed and developed a custom instrument called the "Instrument Droid" to characterize various voltage sources and regulators by measuring their Thevenin equivalent parameters. The Instrument Droid is capable of sweeping the load current and measuring the corresponding output voltages to determine the Thevenin voltage (VTH) and Thevenin resistance (RTH) of the voltage source under test.
  • The Instrument Droid incorporates an Arduino microcontroller, a digital-to-analog converter (DAC) to control the load current, an analog-to-digital converter (ADC) to measure voltages, an op-amp to drive the MOSFET load, and a MOSFET acting as a voltage-controlled current source. The system employs differential voltage measurement techniques and a pulsed current approach to manage power dissipation and ensure accurate measurements.
  • To validate the Instrument Droid's performance, known voltage sources such as a function generator and a bench power supply with a known series resistor were characterized. The measured Thevenin parameters closely matched the expected values, confirming the instrument's accuracy. Subsequently, various unknown voltage sources, including wall warts, batteries, and other common laboratory sources, were characterized. The Instrument Droid successfully determined their Thevenin parameters, providing valuable insights into their behavior under varying load conditions.
  • I also incorporated all the good layout practices and created 4 layer board, and type C footprint.
  • Link: Report and Photos

See some Work I've Done..!

View Code


ESD lab

Embedded Systems Design Labs

Introduced to 8051 and ARM processors through assemblers and simulators/debuggers. Learned Atmel AT16V8C SPLD design using WinCUPL/WinSim suite. Integrated NVRAM, LED status indicators, and AT89C51RC2 processor for in-circuit programming. Developed assembly programs for I/O operations and Interrupt Service Routines (ISRs). Focused on RS-232 circuit design and ARM development tools. Set up and programmed 8051 device drivers for serial communication and external XRAM. Developed C programs using the SDCC compiler, focusing on hardware initialization. Explored ARM architecture, UART communication, and PWM signal generation on the STM32 board. Integrated serial EEPROM and LCD into hardware, developing bit-banged and memory-mapped I/O interfaces. Wrote device drivers and user interface programs in assembly and C.

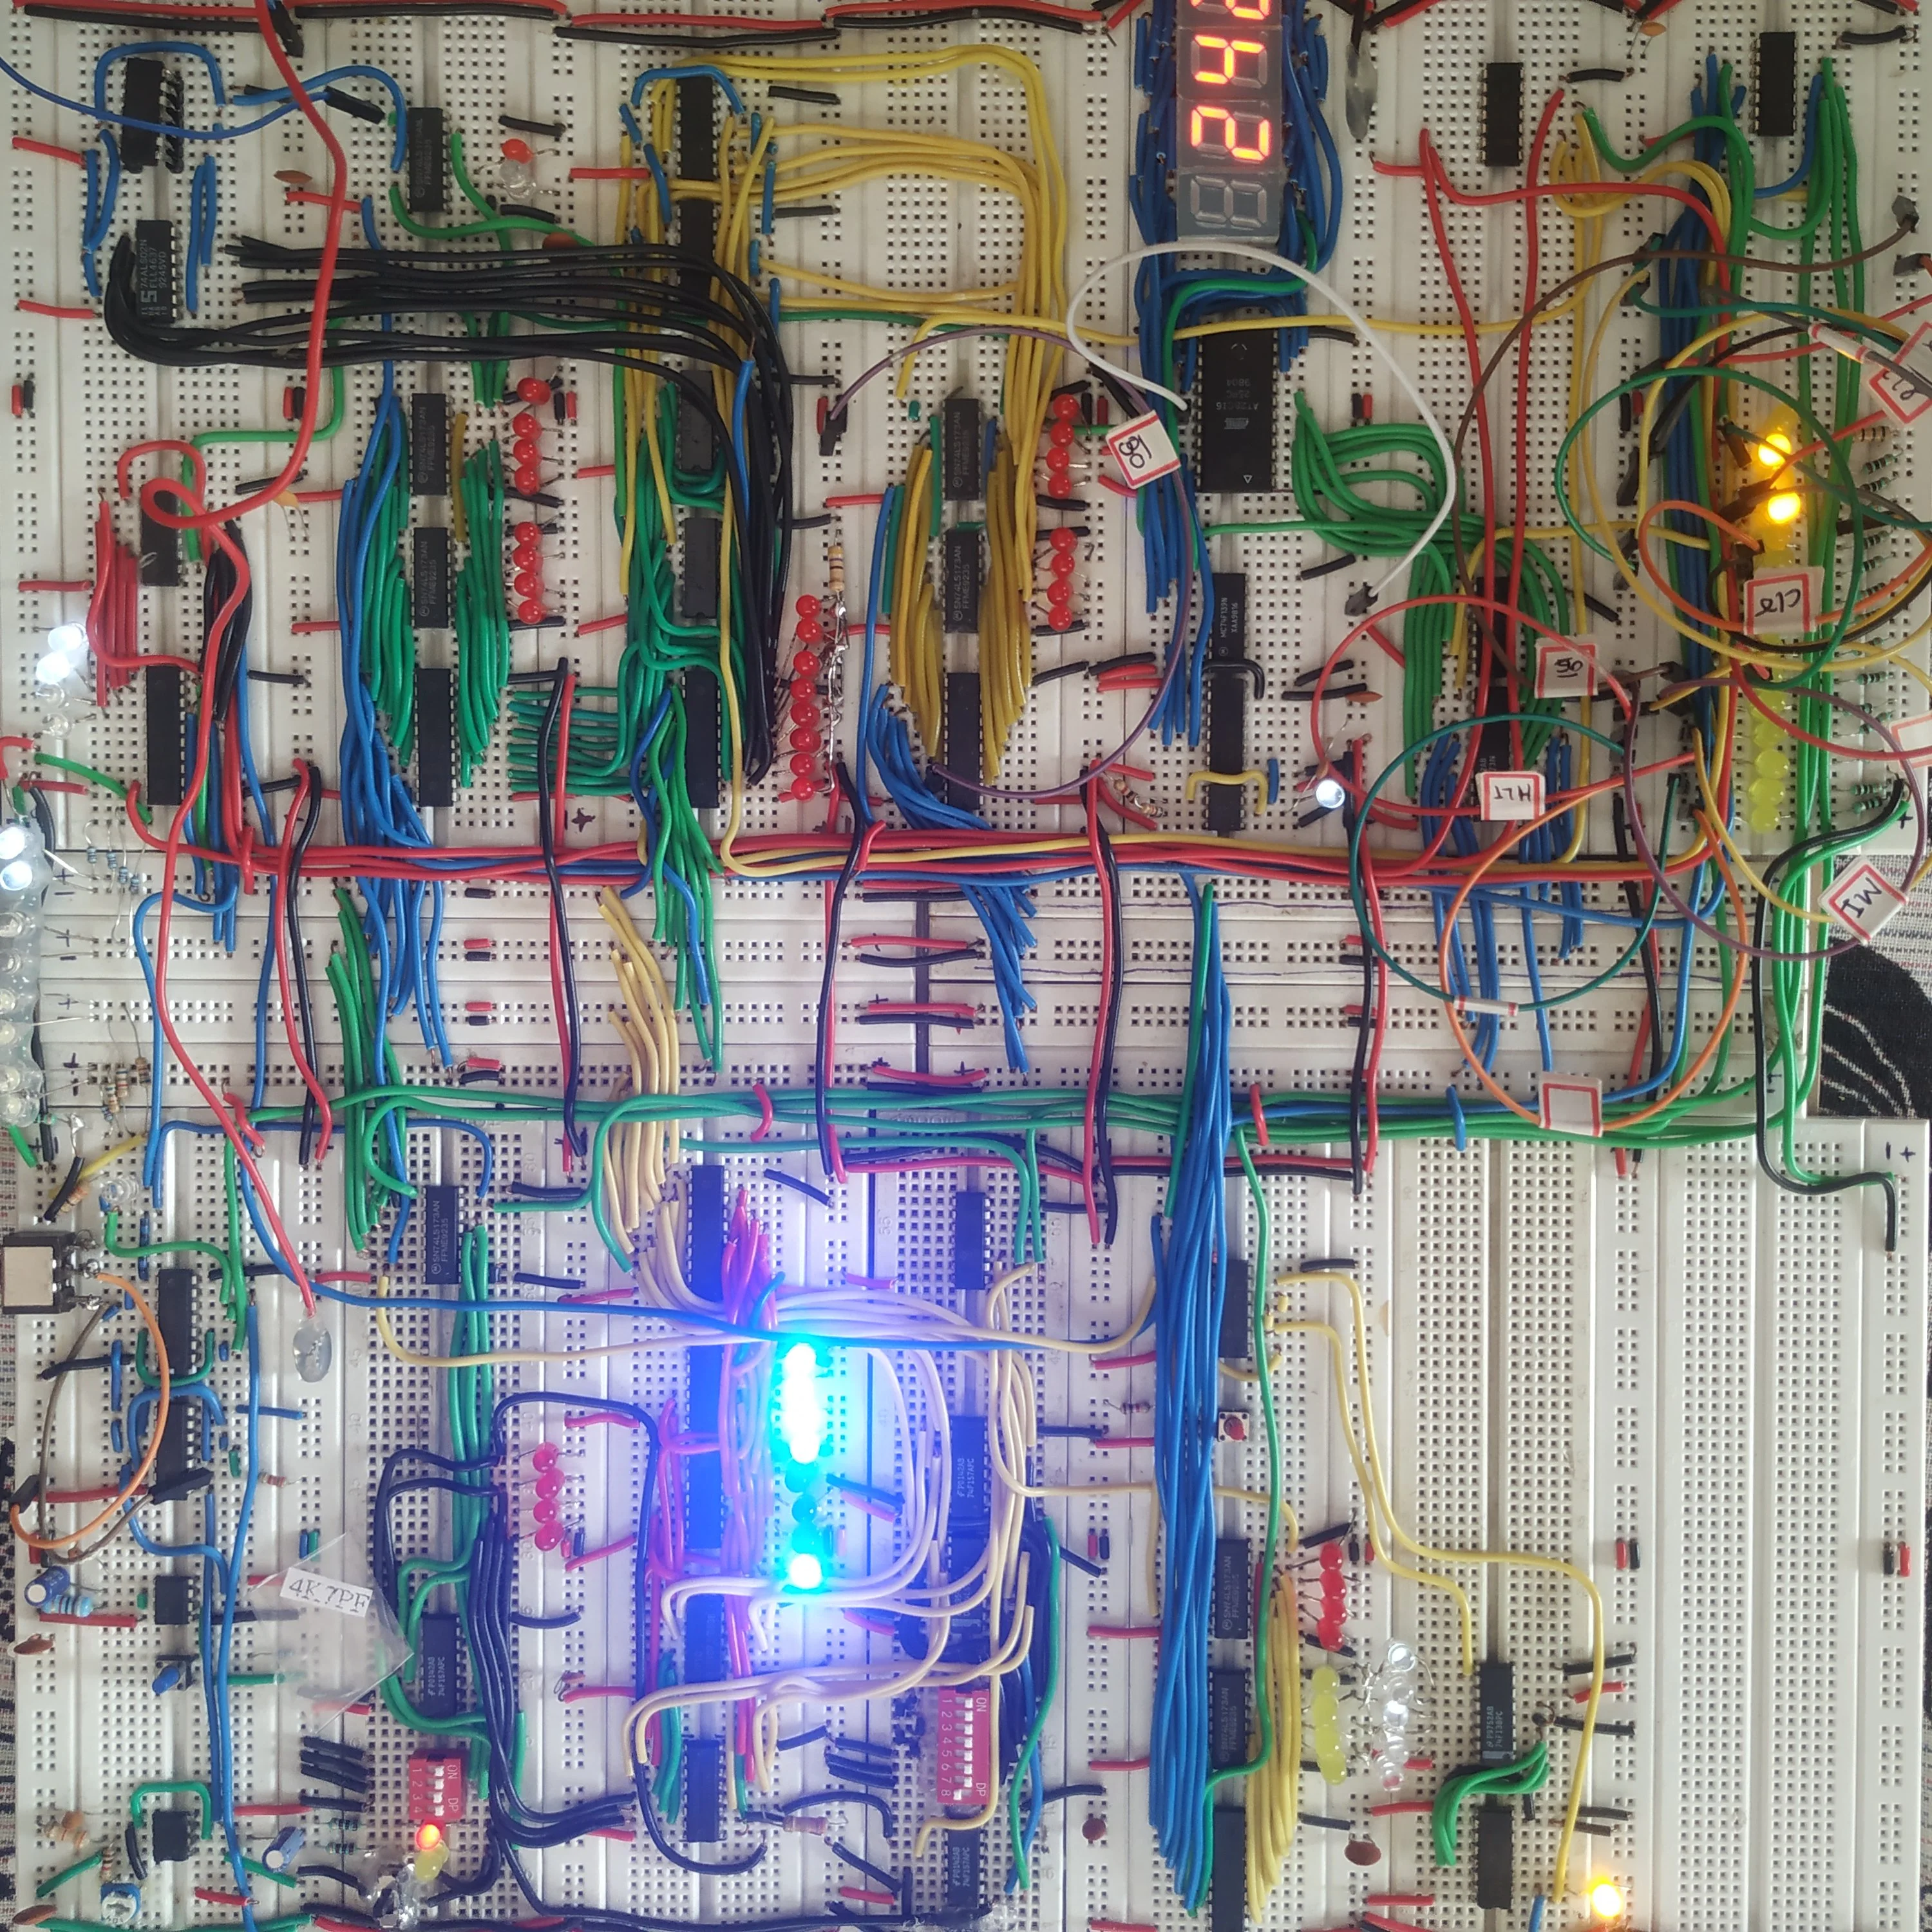
Implemented 8051 based board with lots of functionality.

Lab 1: Introduction to Microcontroller Systems and Basic Hardware Development

Objective: Lab 1 served as an introductory platform for foundational concepts in embedded systems, focusing on:
  • Familiarization with assemblers and simulators/debuggers for 8051 and ARM processors.
  • Learning the WinCUPL/WinSim design suite for Atmel AT16V8C SPLD.
  • Planning and implementing a development board layout.
  • Gaining initial experience in schematic capture and soldering techniques.

Approach: The lab was divided into three main parts:
  • Part 1: Centered around basic programming using the 8051 assembler and simulation tools, setting up the development environment.
  • Part 2: Focused on the layout and initial assembly of the development board, including power supply and reset circuitry.
  • Part 3: Dedicated to finalizing the hardware setup and ensuring all components were correctly soldered and functioning.

Lab 2: NVRAM Integration and Serial Communication in Embedded Systems

Objective: Lab 2 was designed to advance our understanding and skills in embedded system design, focusing on memory integration and serial communication. Key tasks included:

  • Incorporating decode logic, non-volatile RAM (NVRAM), and a status LED into existing hardware.
  • Programming and testing NVRAM for both code storage and, later, as standard SRAM for data storage.
  • Developing assembly programs for I/O operations and learning to write Interrupt Service Routines
  • (ISRs).
  • Utilizing device programmers for efficient code storage.
  • Leveraging logic analyzers for detailed state and timing analysis.
  • Integrating the AT89C51RC2 processor for in-circuit programming.
  • Continuing exploration of ARM architecture and development boards.

Approach and Implementation: The lab was structured in two parts, each focusing on different elements and processors:
  • Part 1: Involved basic setup with the C501 processor, where we developed an assembly program containing a main loop and an ISR to control an LED's blinking rate.
  • Part 2: Advanced to using the Atmel AT89C51RC2 processor, emphasizing RS-232 circuit design and in-circuit programming. Additionally, we explored ARM development tools and wrote programs for LED control on ARM boards.

Lab 3: Serial Communication and XRAM Utilization in Embedded Systems

Objective: The primary goal of this lab was to deepen understanding and practical skills in configuring and utilizing serial communication and external memory in embedded systems. Specific focus was placed on:
  • Setting up and writing device drivers for 8051 serial communication.
  • Utilizing both internal and external XRAM, particularly with NVSRAM.
  • Developing C programs using the SDCC compiler and ensuring proper hardware initialization.
  • Expanding knowledge on ARM architecture and its development tools.
Approach: The lab was structured into three main parts, each with distinct objectives and deadlines:
  • Part 1: Focused on basic setup and configuration, including using NVSRAM for extended memory and integrating PAULMON2 monitor program.
  • Part 2: Advanced towards programming the processor, including setting up UART communication and generating a PWM signal on the STM32 board. Emphasis was on handling various buffer sizes and managing heap space efficiently.
  • Part 3: Aimed at demonstrating additional ARM functionalities and implementing a 'virtual' debug port

Lab 4: Advanced Interface and User Experience Design

Objective: Lab 4 in Embedded System Design course offers an in-depth exploration into advanced hardware interfacing and user interface development, focusing on:
  • Integrating a serial EEPROM and an LCD into the hardware setup.
  • Developing bit-banged interfaces for EEPROM and memory-mapped I/O interfaces for the LCD.
  • Creating device drivers and writing assembly and C programs for user interaction.
  • Enhancing knowledge and experience in code integration and embedded C, including the use of interrupts.
  • Continuing exploration of the ARM architecture.
Lab Structure:
  • EEPROM Integration: I successfully added a serial EEPROM to my hardware and created a bit-banged interface. This involved careful reading of relevant guides and datasheets, followed by designing and implementing an effective connection to the EEPROM through unused port pins. My approach ensured efficient use of processor address space.
  • LCD Implementation: The addition of an LCD to my hardware was a significant step. I developed a memory-mapped I/O interface for the LCD, leveraging my C programming skills to enable interaction with the LCD as a memory-mapped peripheral. This task required a thorough understanding of the LCD’s data sheets and the creation of a reliable physical interface for the LCD on my board.
  • Software Development: I wrote device drivers for both the EEPROM and LCD. This involved coding in both assembly and C languages. I focused on creating a user interface and various user tasks, demonstrating my ability to handle complex programming requirements.
  • Code Integration and Embedded C : A major part of this lab was integrating the various code modules into a single, cohesive program. I gained valuable experience in handling interrupts and using embedded C in a real-world context.
  • ARM Architecture Learning: Continuously throughout the lab, I explored and applied aspects of the ARM architecture, which enhanced my understanding of different processor architectures.
  • User Interface Development: An important aspect of my work was ensuring that the user interface was intuitive and robust. I implemented features like EEPROM data writing/reading, LCD displays, and custom character creation, paying attention to handling user input efficiently and elegantly.
  • Testing and Debugging: I used tools like logic analyzers and oscilloscopes to validate the functionality of my interfaces, ensuring that the timing and data transfers were accurate and reliable.
Send me email for any codes or implementations


C++ Simulator

Simulator in C++ for 6052 Computer

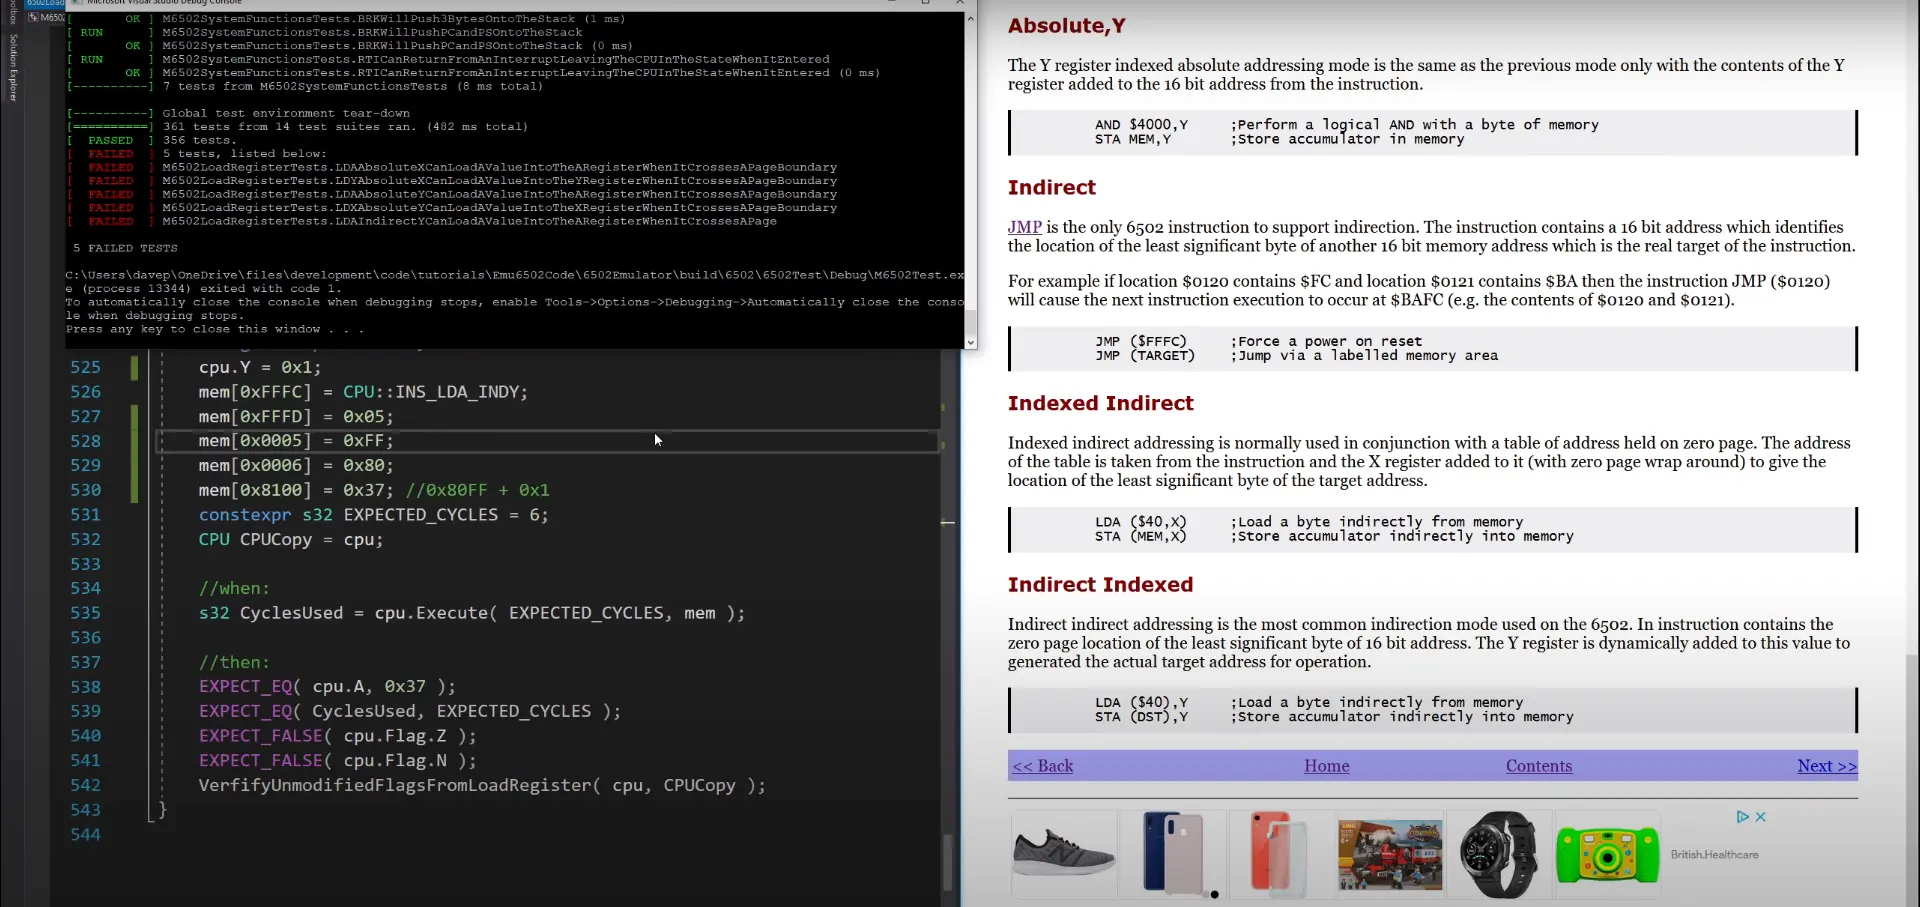
Developed a 6052 computer simulator in C++ with virtual memory to execute assembly-like programs. Implemented the complete 6052 instruction set, including operations like LDA, JMP, BEQ, and CMP, mirroring actual assembly language opcodes. Constructed a virtual memory structure using C++ unions, accurately emulating the 6052 computer's memory model. Ensured precise instruction execution and addressing modes, with processor status flag modifications. Validated functionality and accuracy of instructions, ALU, and memory with Google Test suite in C++.

Simulated 6052 computer in the C++ that can run programs which sits in to virtual memory.

implemented all the register and memory unit, alu to simulate 6052, and all the Instruction with the same op code to run the simulated version of asm in the code

One of the key features of this simulator is the implementation of the 6052 instruction set. I have programmed a range of instructions with the same opcodes as the actual 6052 assembly language. These instructions include:

  • LDA, LDX/Y: Load Accumulator, Load X/Y Register
  • STA, STX/Y: Store Accumulator, Store X/Y Register
  • JMP: Jump to another location
  • RTS: Return from Subroutine
  • JSR: Jump to Subroutine
  • BEQ: Branch if Equal
  • CMP: Compare Accumulator
  • TAX, TAY: Transfer Accumulator to X, Transfer Accumulator to Y
  • NOP: No Operation

Each instruction was implemented as 6502 instruction set, ensuring that the simulator could execute a given set of assembly instructions. This included handling various addressing modes and correctly modifying processor status flags as per the operation's result.

The virtual memory structure made with c union is the main thing in the simulation, storing the program code and data. This structure was designed to reflect the memory model of a 6052 computer.

Tested all the Instructions, ALU and memory map with google test suit for C++ to ensure all the the instructions and programs are working perfectly

Tech stack: C++, GTest

View Code


16 bit CPU using HDL

Simulated 16 bit CPU using HDL

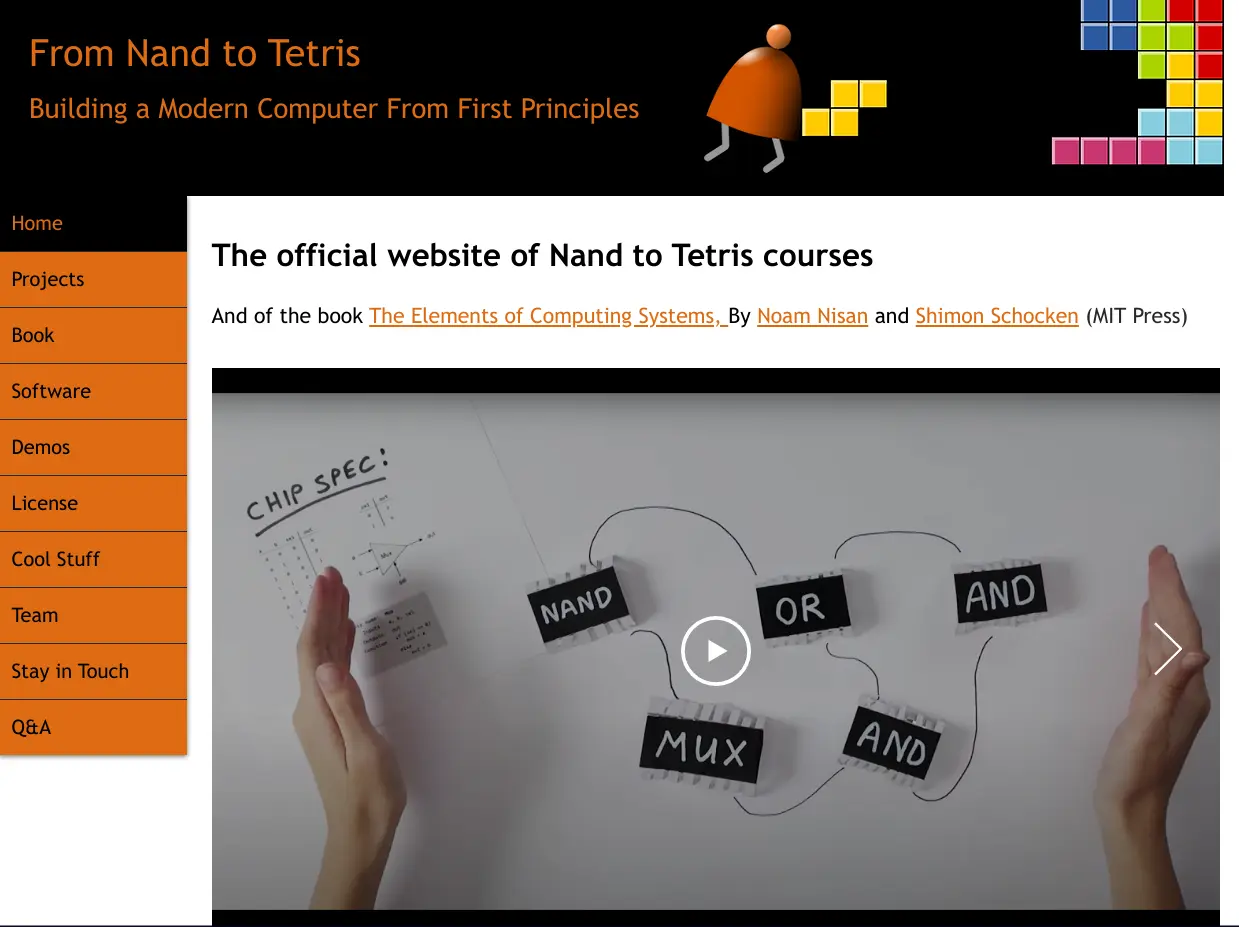
Developed a 16-bit CPU from scratch in Hardware Description Language (HDL) as part of the NAND 2 Tetris course, demonstrating advanced understanding of digital logic and computer architecture. Designed and integrated key CPU components like the ALU, registers, and control units in HDL, ensuring effective computational capabilities. Conducted thorough testing and simulation of the CPU functionality using a course-specific simulator, ensuring accurate instruction execution and debugging. Enabled the CPU to run complex programs such as Pong and Space Invaders, demonstrating its robust computational power and real-time operation. Integrated the CPU with JackOS, showcasing its ability to operate with an OS and emphasizing its practicality and applicability in real-world scenarios.

In this project, I made a 16-bit CPU from the ground up, leveraging the concepts and tools provided in the NAND 2 Tetris course. The entire development process was conducted in HDL (Hardware Description Language), with a deep understanding of fundamental hardware principles and digital logic design.


CPU Design and Implementation:

The CPU was architected to be a 16-bit processor.

All the essential logic gates and CPU elements, including ALU (Arithmetic Logic Unit), registers, and control units, were constructed in HDL. This process involved defining the behavior of each component testing the component by the simulation software and ensuring their correct integration within the CPU architecture.
Simulation and Testing:

The functionality of the CPU was tested and simulated using a course-specific simulator. This simulator provided a platform to validate the design, test instruction execution.


Running Complex Programs:

The CPU was capable of running complex and computationally demanding programs, such as Pong and Space Invaders.

A virtual screen was simulated through software to display the output of these programs, providing a visual interface to interact with and observe the CPU's operation in real-time.
Operating System Integration (JackOS):

The CPU was integrated with an operating system, JackOS, which was provided by the course instructor. This OS was used for, handling processes, and the execution of programs.

Visit Course

View Code

social media for programmers

Drivers for STM32F4

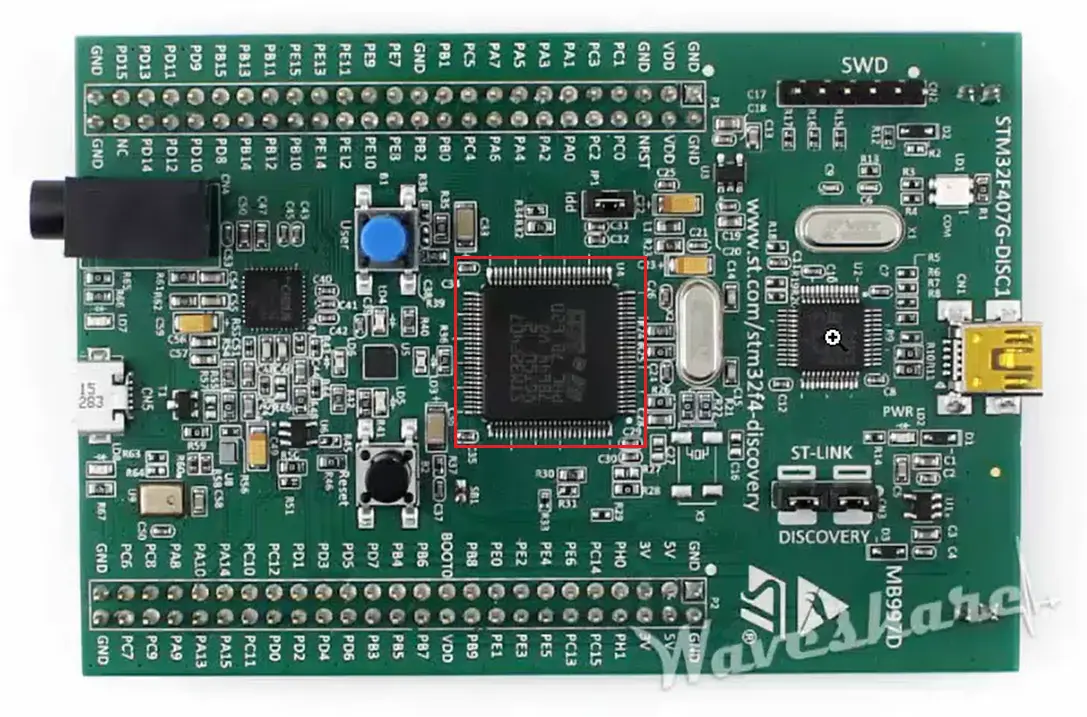
Developed Bare-metal Drivers for STM32F411 (ARM cortex M4 core) like DMA, DAC Watchdog, PWM, UART, etc.

Visit Website

View Code

Login With Face

LogUp - Attendance System with Decentralized Face Recognition

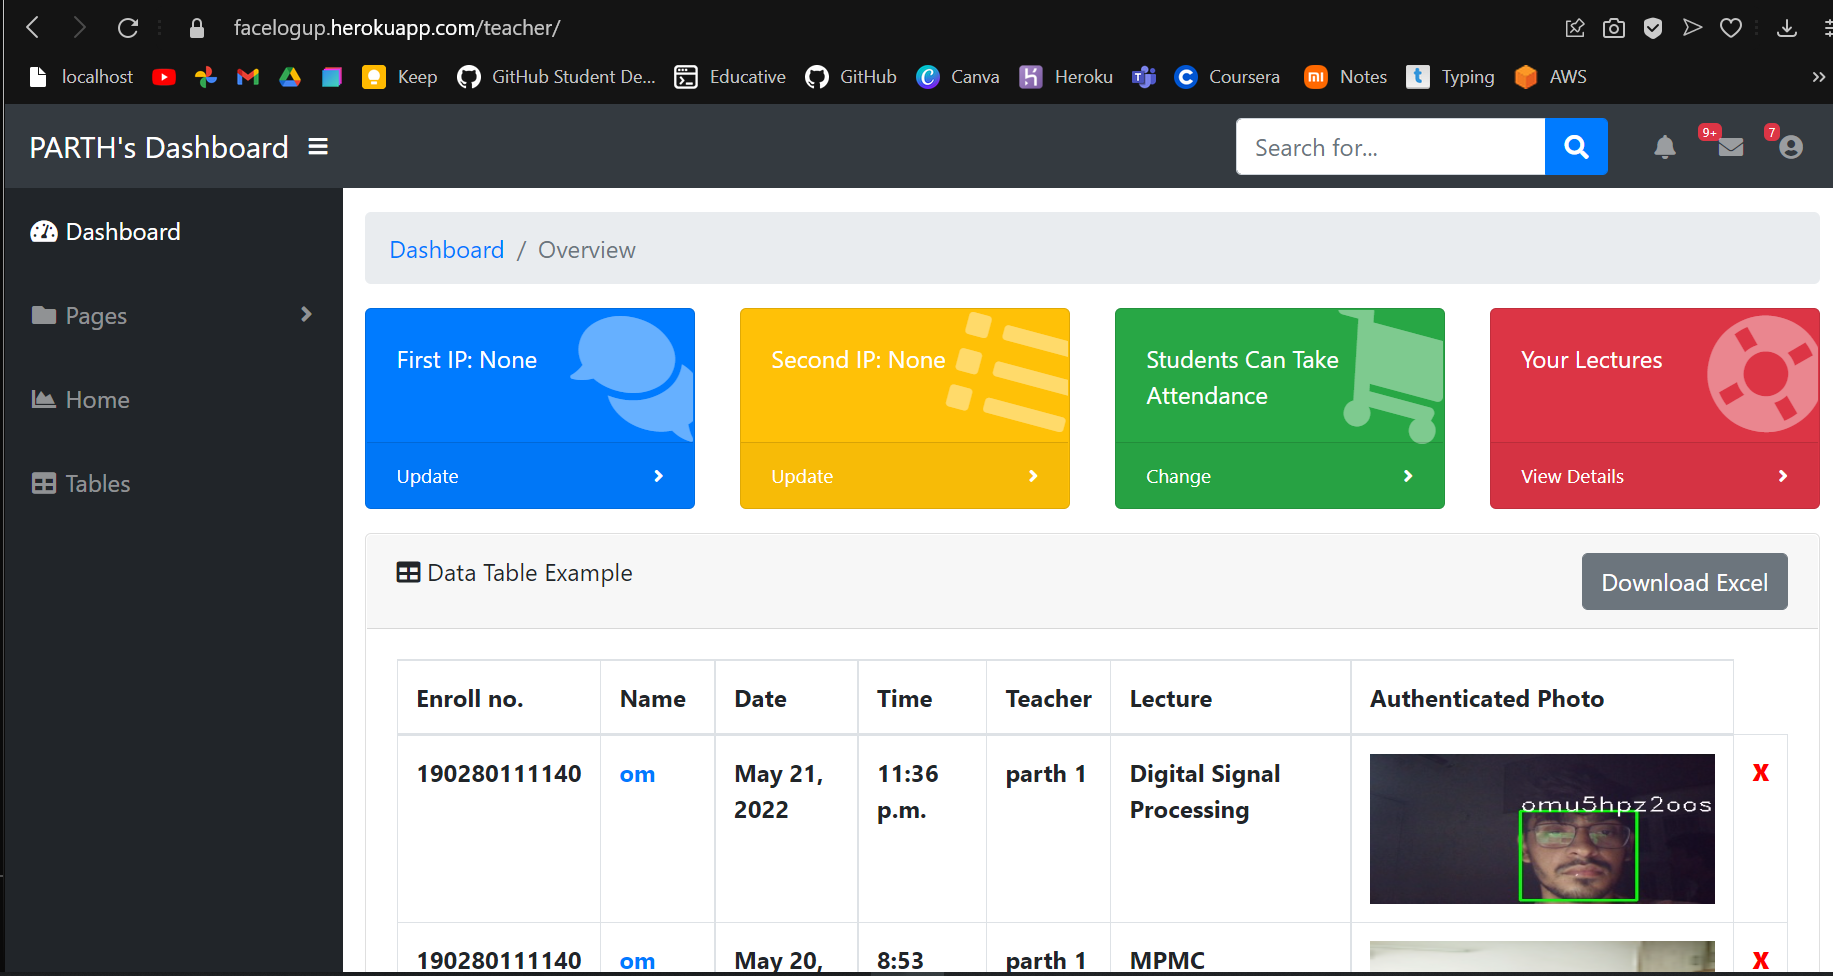
Developed a facial recognition-based decentralized attendance system using Django, designed for schools and industries, requiring only a camera and internet. Features include local IP and GPS detection for physical attendance verification, mass user creation via Excel, and a teacher dashboard for lecture and session management. The system supports real-time tracking, reporting, analytics, and is scalable for new users, devices, and locations. Implemented with technologies like Django, TensorFlow, OpenCV, AWS (EC2, S3), AJAX, JavaScript, Redis, PostgreSQL, Celery, and Channels.

this decentralized attendance system uses facial recognition technology and Django framework. It's easy to use, accurate, and can be used in schools and industries. You only need a camera and internet connection to use it. The interface is customizable and provides real-time tracking, reporting, and analytics. It's scalable and easy to add new users, devices, and locations. It's a modern solution for attendance tracking!

Features

  • local ip and gps detaction for the physical attendance
  • Mass User creation with excel sheet
  • Fully working teacher dashboard
  • Lecture and session Management, Sessions can be seen from dashboard
  • Download overall attendace, session attendance, lecture attendance
  • User profile page
  • user can search the lectures send request to teache for joining the lecture
  • teacher can enable and disable the lecture according to need and that will create another session for the lecture
  • lectue,session management tools
  • search teacher and lecture in the same college
  • (working) send message to contact the student or teacher
  • teacher can take attendance and also change the attendance

Why it is full (fool) proof

  • it uses local ip and gps to determine the location of the student
  • Teacher can randomly start the session and take attendace, also this session will automaticaly stop after some predefined time uses face recognition to check the student's avability
  • student can't change the profile photo after updating it once / only teacher can change the photo
  • During my time in college(LD College of engineering), I used this website to mark attendance two to three times.

    Tech stack: Django, Tensorflow, OpenCV, AWS EC2, AWS S3, AJAX, JS, Redis,PostgreSQL, Celery, Channels

    Visit Website

    View Code


    Smart IoT system

    IoT Ecosystem from Scratch

    Developed an IoT ecosystem using Django and custom C++ library for ESP32, enhancing data communication and network efficiency. Implemented HTTPS/WebSocket for secure, real-time data exchange. Enabled versatile data handling from digital signals to GPS tracking. Utilized Django REST for backend API interactions, with asynchronous HTTPS requests on ESP32 for reduced latency. Introduced dynamic ESP32 device management for scalable system expansion. Achieved robust software-hardware integration for diverse IoT application

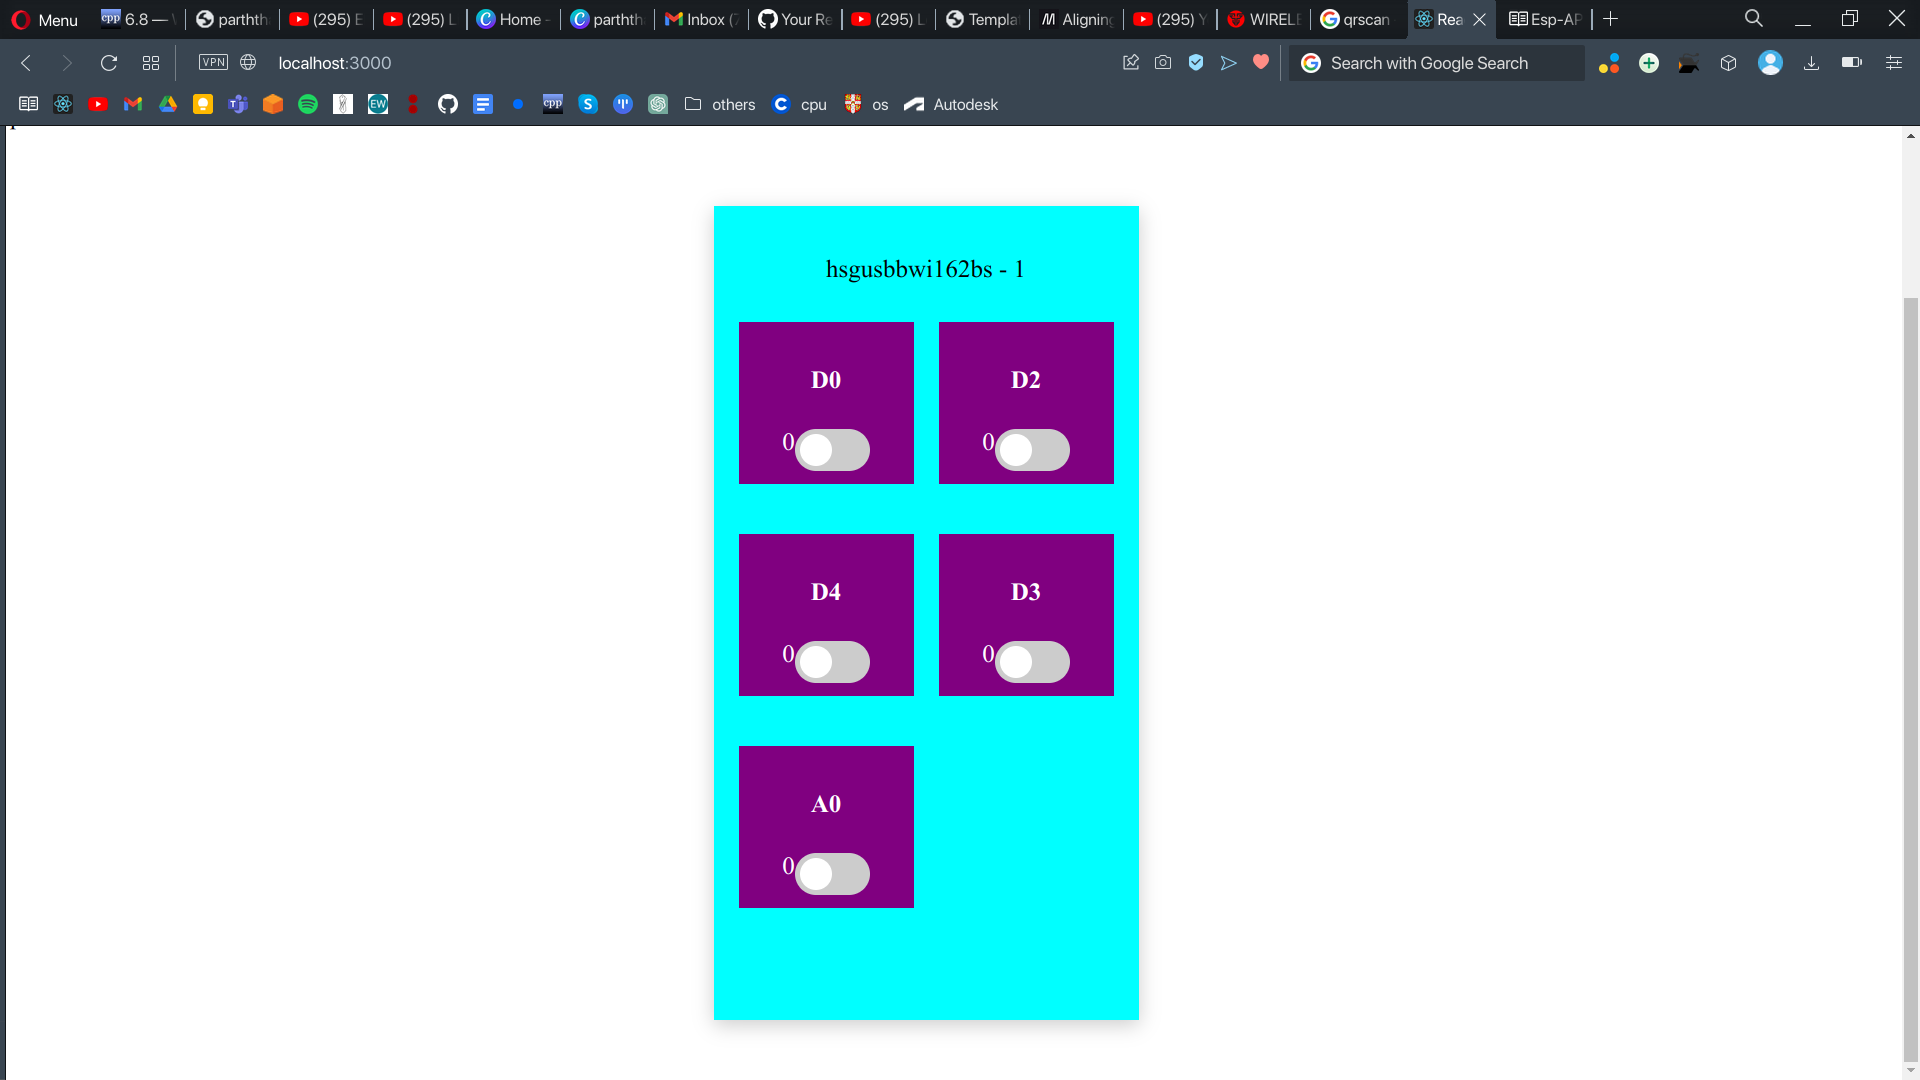
    In this project, an IoT platform was developed comprising a website for server-side rendering utilizing the Django framework and an ESP32/ESP8266 for client-side rendering. Additionally, this cloud API and an app for communication with the server and an ESP32 was created in the python, Additionally I developed an library to enable communication between all aforementioned components.

    In this project, I have developed a Internet of Things (IoT) ecosystem using Django and the Django REST framework. This ecosystem is designed to be integrated with ESP32 microcontrollers, leveraging a custom library written in C++ for communication and data handling.

    Custom ESP32 Library in C++: The core of the system's hardware interaction lies in the custom C++ library developed for the ESP32. This library is engineered to efficiently manage data communication between the ESP32 and the server. It makes use of the EEPROM (Electrically Erasable Programmable Read-Only Memory) to intelligently filter and eliminate redundant data received from the server. Furthermore, it is programmed to send data back to the server only when necessary, optimizing network traffic and system performance.

    HTTPS and WebSocket Communication: The IoT ecosystem utilizes HTTPS for secure data transmission, ensuring that all communication between the ESP32 devices and the server is encrypted and safe from potential intrusions. Additionally, WebSocket technology is employed for real-time data exchange, enhancing the responsiveness and interactivity of the system.

    Customizable Data Handling: One of the key features of this ecosystem is its flexibility in data handling. Users have the capability to customize the type of data sent from the ESP32, ranging from digital and analog signals to GPS coordinates. This versatility allows the system to be adapted for various use cases, including location tracking which can be visually represented on maps.

    Django Backend with REST API: At the backend, Django serves as the robust framework supporting the system, with the Django REST framework facilitating API interactions. These APIs are crucial for receiving data from the ESP32 devices and sending commands or information back to them.

    Asynchronous HTTPS Requests on ESP32: To minimize latency in API communication, the ESP32 library is designed to handle HTTPS requests asynchronously. This approach reduces the delay in sending and receiving API requests, thereby enhancing the overall efficiency of the system.

    Dynamic ESP32 Management: The system provides features for dynamically adding or removing ESP32 instances. This functionality is crucial for scaling the system and managing multiple devices simultaneously.

    WebSocket Data Transmission: In addition to HTTPS, the ecosystem also supports data transmission through WebSockets. This feature is particularly useful for scenarios where continuous and real-time data streaming is required, such as in sensor monitoring applications.

    This IoT ecosystem, developed from scratch, exemplifies a sophisticated blend of software and hardware integration. By combining the power of Django with custom C++ programming for the ESP32, the system offers a versatile and secure platform for various IoT applications. Its ability to handle different data types, including real-time location tracking, along with efficient communication protocols like HTTPS and WebSockets, makes it a robust solution for modern IoT challenges.

    The technical stack employed in the realization of this project included Django, PostgreSQL, Django-Rest-Framework, ESP32, C++ and React.

    Visit Website

    View Hardware Code

    View Software Code


    RTOS baremetal

    Baremetal RTOS in Stm32f070

    Developed a custom Real-Time Operating System (RTOS) for STM32F0711 (ARM Cortex M0+ architecture), featuring Round Robin, Cooperative, and Periodic scheduling methodologies. Implemented mutexes for resource management and a SysTick handler for precise task switching. Utilized ARM assembly for efficient context switching, preserving task state integrity. Managed task stack space to prevent overflows, ensuring reliable task execution. Demonstrated expertise in low-level programming, real-time concepts, and flexible task scheduling for diverse real-time applications.

    In this project, I developed a custom bare-metal RTOS made for the STM32F0711 board, which is based on the ARM Cortex M0+ architecture. This RTOS was implemented in three distinct scheduling methodologies: Round Robin, Cooperative, and Periodic Scheduler. Each of these implementations caters to different operational requirements.

    Round Robin Scheduling: In this mode, the RTOS allocates a fixed time slice to each task, rotating through them in a cyclic order. This approach ensures fair CPU time distribution among all tasks, suitable for systems where tasks have similar priority levels.

    Cooperative Scheduling: Under cooperative scheduling, tasks voluntarily yield control back to the scheduler, allowing other tasks to execute. This method provides more control to the individual tasks over their execution but requires well-designed task interaction to prevent issues like task starvation.

    Periodic Scheduler: The periodic scheduler is designed for tasks that need to run at regular intervals. This implementation is particularly useful for time-sensitive tasks that require consistent and predictable execution timing.

    Mutex Implementation: To manage access to shared resources, I have incorporated mutexes in the RTOS. These mutexes are essential for avoiding race conditions and ensuring data integrity when multiple tasks access the same resource.

    SysTick Handler for Task Switching: The core of the task management mechanism in this RTOS is the SysTick handler. This handler is responsible for task switching, leveraging the SysTick timer of the STM32F0711 board to trigger context switches at precise intervals.

    Context Switching with ARM Assembly: One of the critical aspects of this RTOS is the efficient handling of context switching. This process involves saving the current state of a task and restoring the state of the next task to be executed. To accomplish this, I used ARM assembly to manipulate the stack and registers, ensuring that each task’s context is preserved and restored accurately. This approach is crucial for maintaining the integrity of task execution and allowing seamless switches between tasks.

    Stack Management for Tasks: Alongside context switching, the RTOS also manages the stack space for each task. This management is vital to prevent stack overflows and to ensure that each task has sufficient stack memory for its execution.

    View Software Code


    KL25Z

    KL25Z Baremetal Drivers

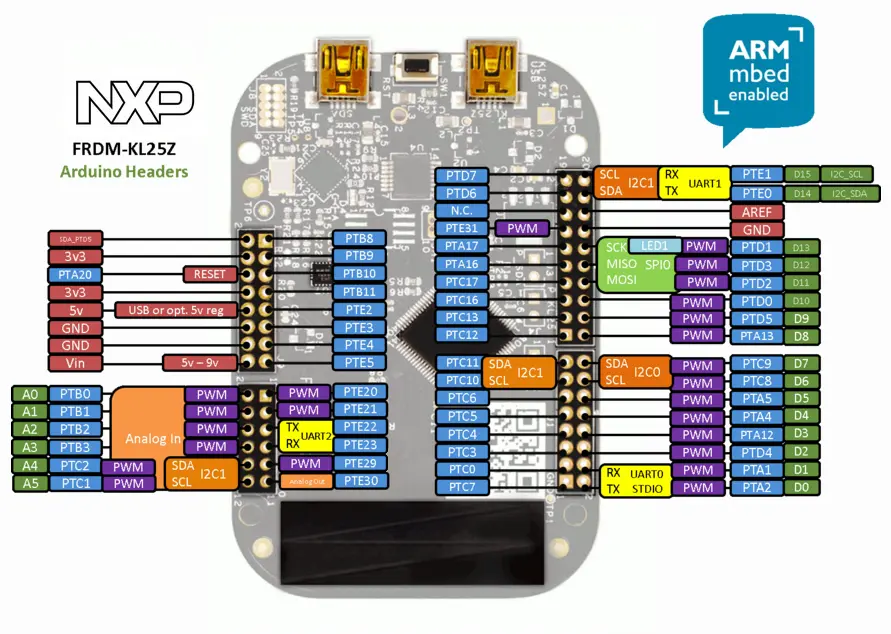
    Developed core drivers for KL25Z ARM Cortex M0+ in bare-metal C using MCUXpresso, including FIFO and Circular Buffer data structures for efficient sequential data management. Implemented UART drivers for serial communication and LED control, along with PWM drivers and timers for precise control in embedded systems. Integrated DMA for efficient data transfers and developed a DAC driver for wave generation, enhancing performance with assembly language optimization (execution time reduced from 400ms to 82ms). Created an OLED display driver for text and graphics, and an SPI driver for managing OLED and MPU6050 gyroscope. Developed an MPU6050 driver with advanced calibration for gyroscope and accelerometer data.

    Developed KL25Z Arm cortex M0+ core drivers in baremetal C in MCUXpresso (IDE for NXP controllers)

    In this group of projects, I have successfully implemented a range of data structures and drivers in C, along with significant code optimizations and the development of a bare-metal OLED display driver. The project encompasses the following key components:


    Data Structures Implementation:

    FIFO (First In First Out) Queue: Implemented using C, this data structure is essential for managing data in a sequential order, mirroring a queue-like behavior. Circular Buffer: Also developed in C, the circular buffer efficiently handles data in a fixed-size storage, cycling through it without the need for shifting elements.


    UART Driver Development:

    Created a driver for Universal Asynchronous Receiver-Transmitter (UART) communication. This driver forms the foundation for serial communication in the embedded system. Using the UART driver, I developed a command processor for controlling an LED. This setup demonstrates the practical application of UART in device control.


    PWM Drivers and Timers:

    Developed Pulse Width Modulation (PWM) drivers, crucial for controlling the duration of an electrical pulse, commonly used in various control applications. Implemented timers to provide accurate time delays and event counting, essential for numerous embedded system functions.


    DMA and DAC Integration:

    Integrated a Direct Memory Access (DMA) bare-metal driver, facilitating efficient data transfers without burdening the CPU. Developed a Digital-to-Analog Converter (DAC) driver, capable of generating square, sine, and triangle waves. This functionality was further enhanced by reading the output using an Analog-to-Digital Converter (ADC) driver.


    Code Optimization:

    Conducted optimization of existing C code to enhance execution speed. Initially, the code execution time was 400 milliseconds, which was significantly reduced to 82 milliseconds after optimization. The performance improvement was partly achieved by integrating assembly language, demonstrating the effectiveness of low-level programming in optimization.


    OLED Display Driver Development:

    Developed a bare-metal driver for a 128x64 OLED display, enabling it to show text and basic line graphics. Created a Serial Peripheral Interface (SPI) driver to operate the OLED display and an MPU6050 gyroscope, showcasing the versatility of SPI in handling multiple devices. The MPU6050 driver was developed from the ground up, including features like calibration for the gyroscope and accelerometer data, to ensure accurate measurements.

    Throw me email for any of the code !

    See some Work I've Done..!

    Autonomus Car

    Atonomus Car

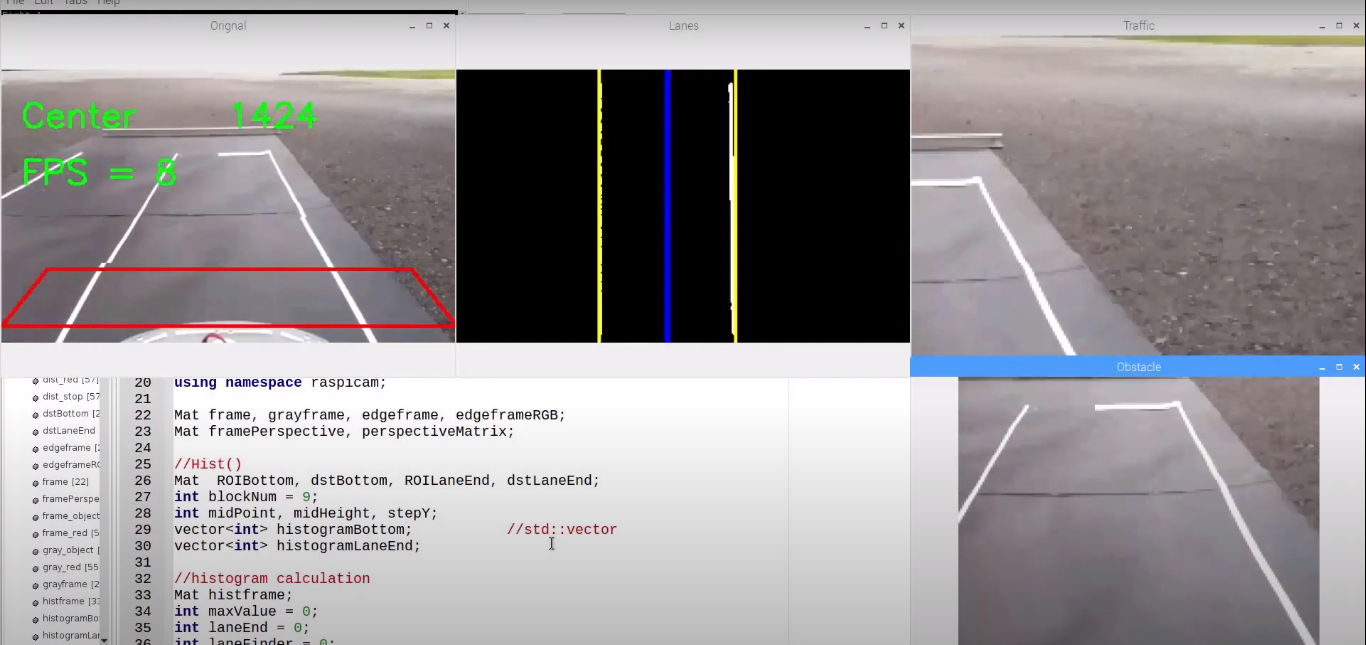
    The vehicle is equipped with the ability to automatically detect lane markings, objects, and obstacles. Furthermore, it is capable of taking appropriate actions to circumvent any detected obstacles and objects.

    Sensors are also installed to provide information pertaining to the weather conditions and the surrounding environment.

    Tech stack:Tensorflow, OpenCV, Raspberry-PI, Arduino, Motor Drivers, Webcam, DHT11, MPU6050

    Closed Source

    Soldier Starp

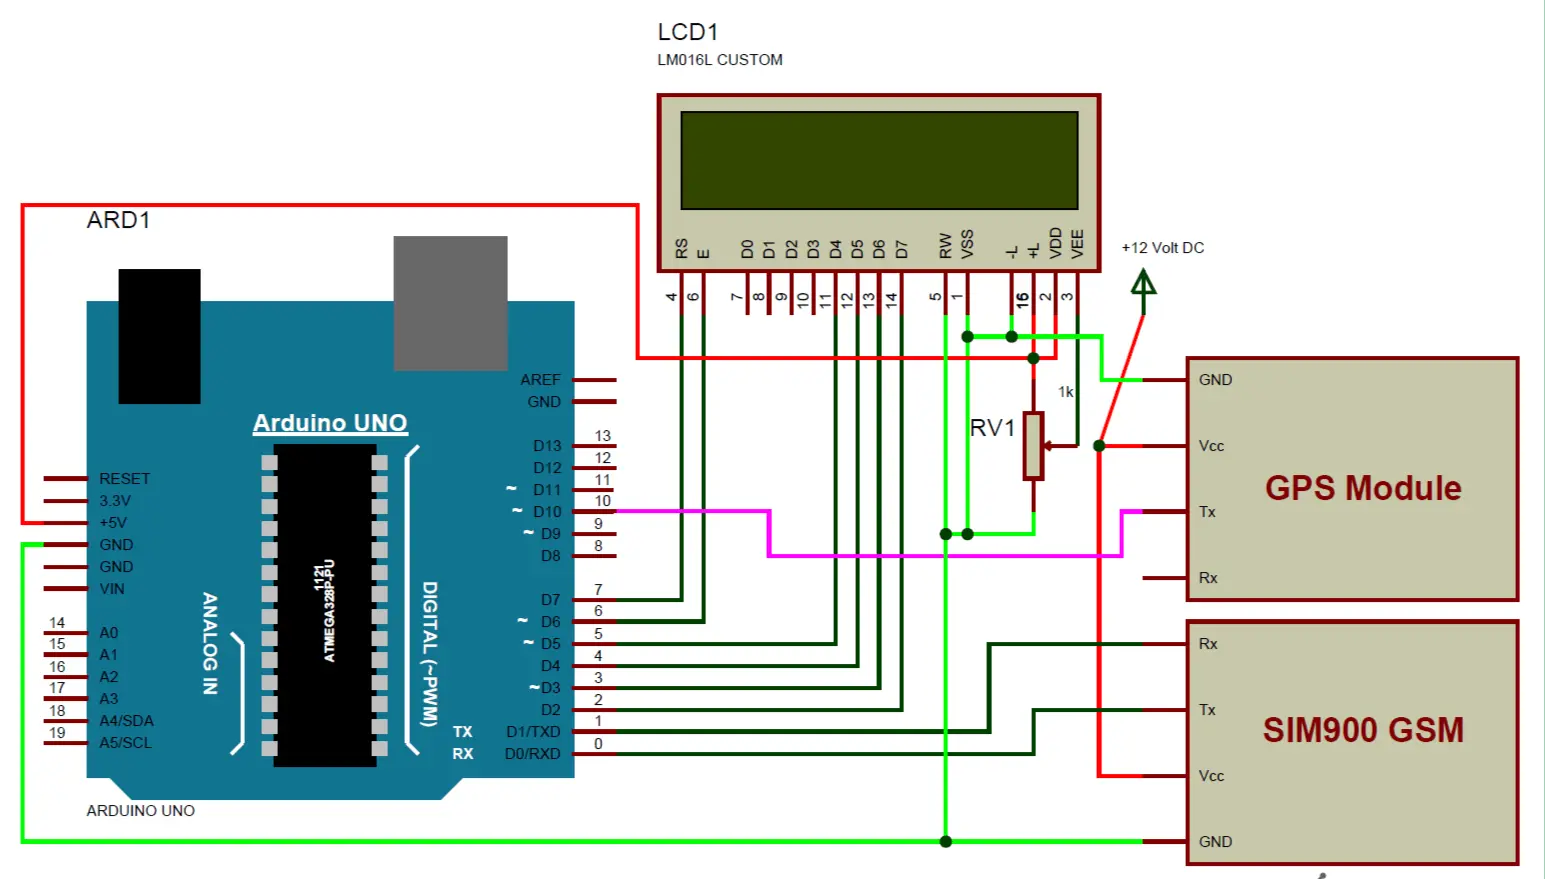
    Technology used :Embedded C, Arduino, Neo6 GPS, GPRS/GSM This strap can deliver GPS coordinates and some body parameters to predefined mobile phone, This was a project for hackathon


    • This can help soldiers to send emergency mesasge and ring headquater when needed.
    • Sensors can sense and send the data like heartbeat, temprature and coordinates of strap.
    • Tech Stack: Ardino, Neo6m GPS, GPRS, LCD, Other sensors like accelerometer, gyro.

    Closed Source


    video call app

    Web-meetup: Online Video Chat App

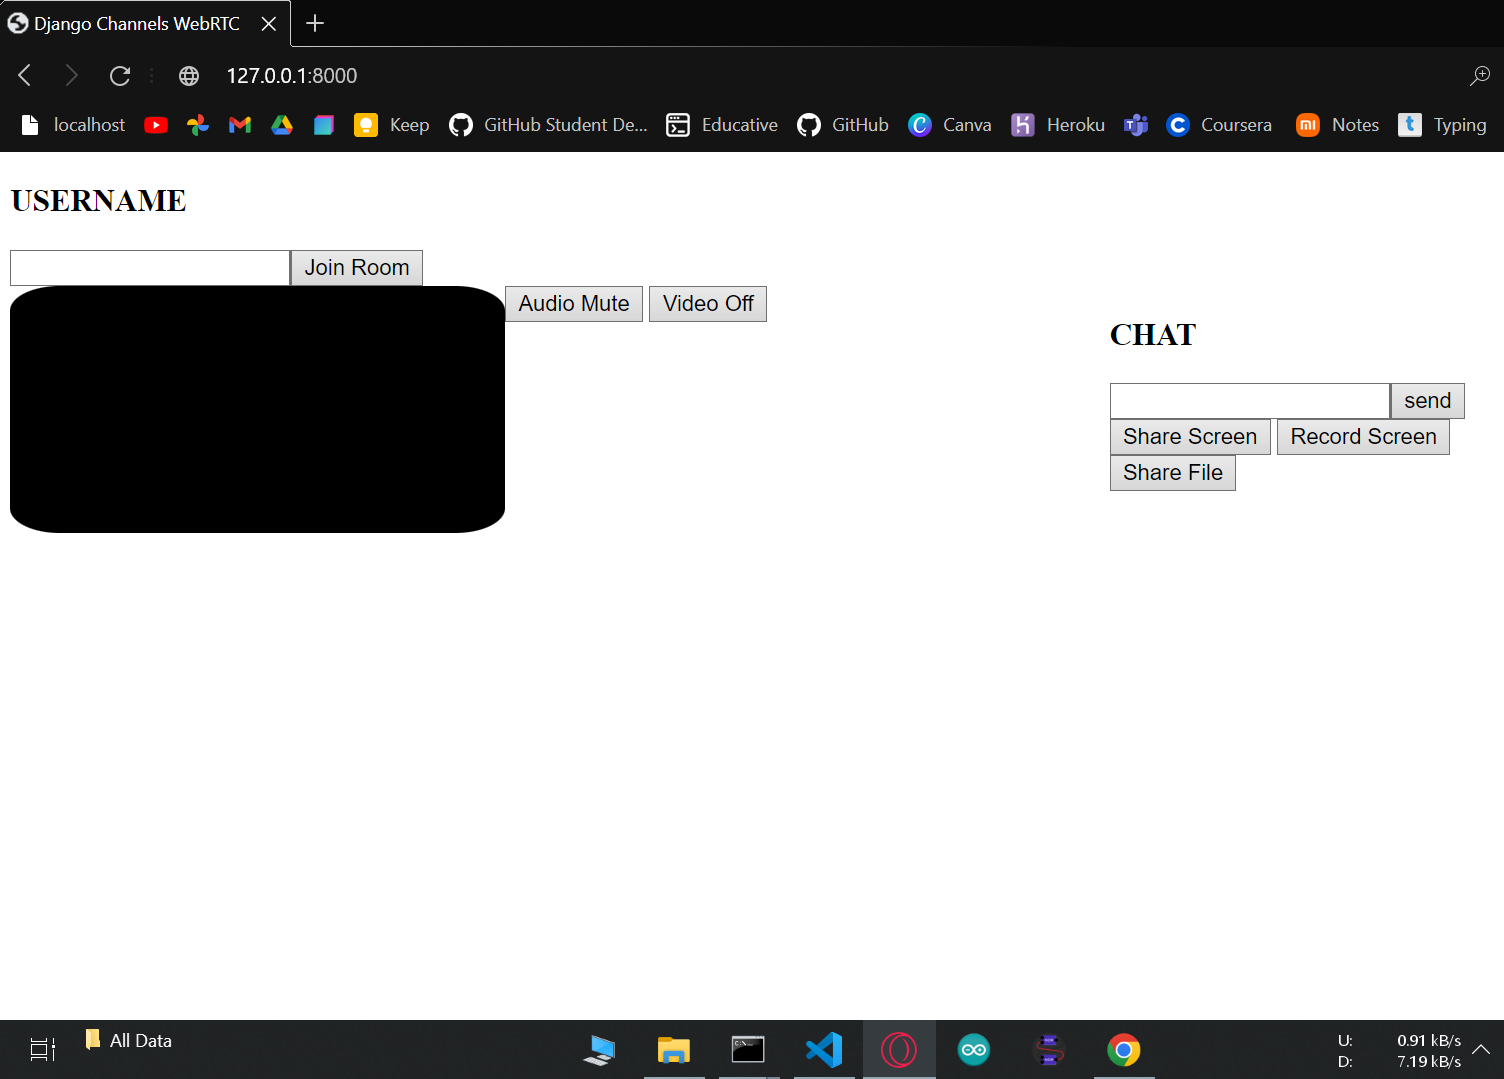
    Developed a video call application with Django, integrating WebRTC and sockets for real-time data and video handling. Features include screen sharing for collaborative work, file sharing for easy information exchange, and in-app chat for text communication. Utilized Django with Redis for enhanced performance and scalability, and Digital Ocean for robust hosting. Extended Django with Channels for WebSocket handling, crucial for live chat and video, and Daphne as an ASGI server for protocol management. Planned future integration with the LogUP website for attendance tracking and online lectures, aiming to create a unified platform for online meetings and educational/professional systems.

    This project is a video call application that includes basic features such as screen sharing, file sharing and in-app chat. using django and WebRTC and sockets to handle live data and video Additionally, I plan to integrate this video chat app into the LogUP website for attendance tracking and conducting online lectures.

    Core Features:

    Screen Sharing: Allows participants to share their screen with others during a call, enhancing collaborative discussions and presentations.

    File Sharing: Enables users to easily share documents, images, and other files directly within the app, streamlining the process of information exchange. In-App Chat: Offers a built-in chat feature for text-based communication during video calls, adding an additional layer of interaction. Technical Stack:

    Django: Serves as the primary web framework, known for its simplicity and effectiveness in building high-quality web applications.

    • Redis: Used as a session store and for caching, enhancing the app's performance and scalability.
    • Digital Ocean: Provides cloud infrastructure services, ensuring robust and reliable hosting for the application.
    • Channels: Extends Django to handle WebSockets, crucial for real-time features like chat and live video.
    • WebRTC: Empowers the app with real-time communication capabilities, enabling high-quality video and audio calls directly in the web browser.
    • Daphne: An ASGI server for Django, handling HTTP, HTTP2, and WebSocket protocols, essential for the app’s real-time functionality.
    • JavaScript (JS): Adds interactivity and controls the client-side behavior of the application, vital for features like UI/UX, file sharing, and screen sharing.
    Future Integration Plans:

    Integration with LogUP Website: The intention is to integrate Web-meetup into the LogUP website, which focuses on attendance tracking and the facilitation of online lectures. This integration aims to create a unified platform that not only allows effective online meetings but also integrates seamlessly with educational and professional attendance systems.

    Tech stack: Django, Redis, Digital Ocean, Channels, WebRTC, Daphene, JS

    View Code


    social media for programmers

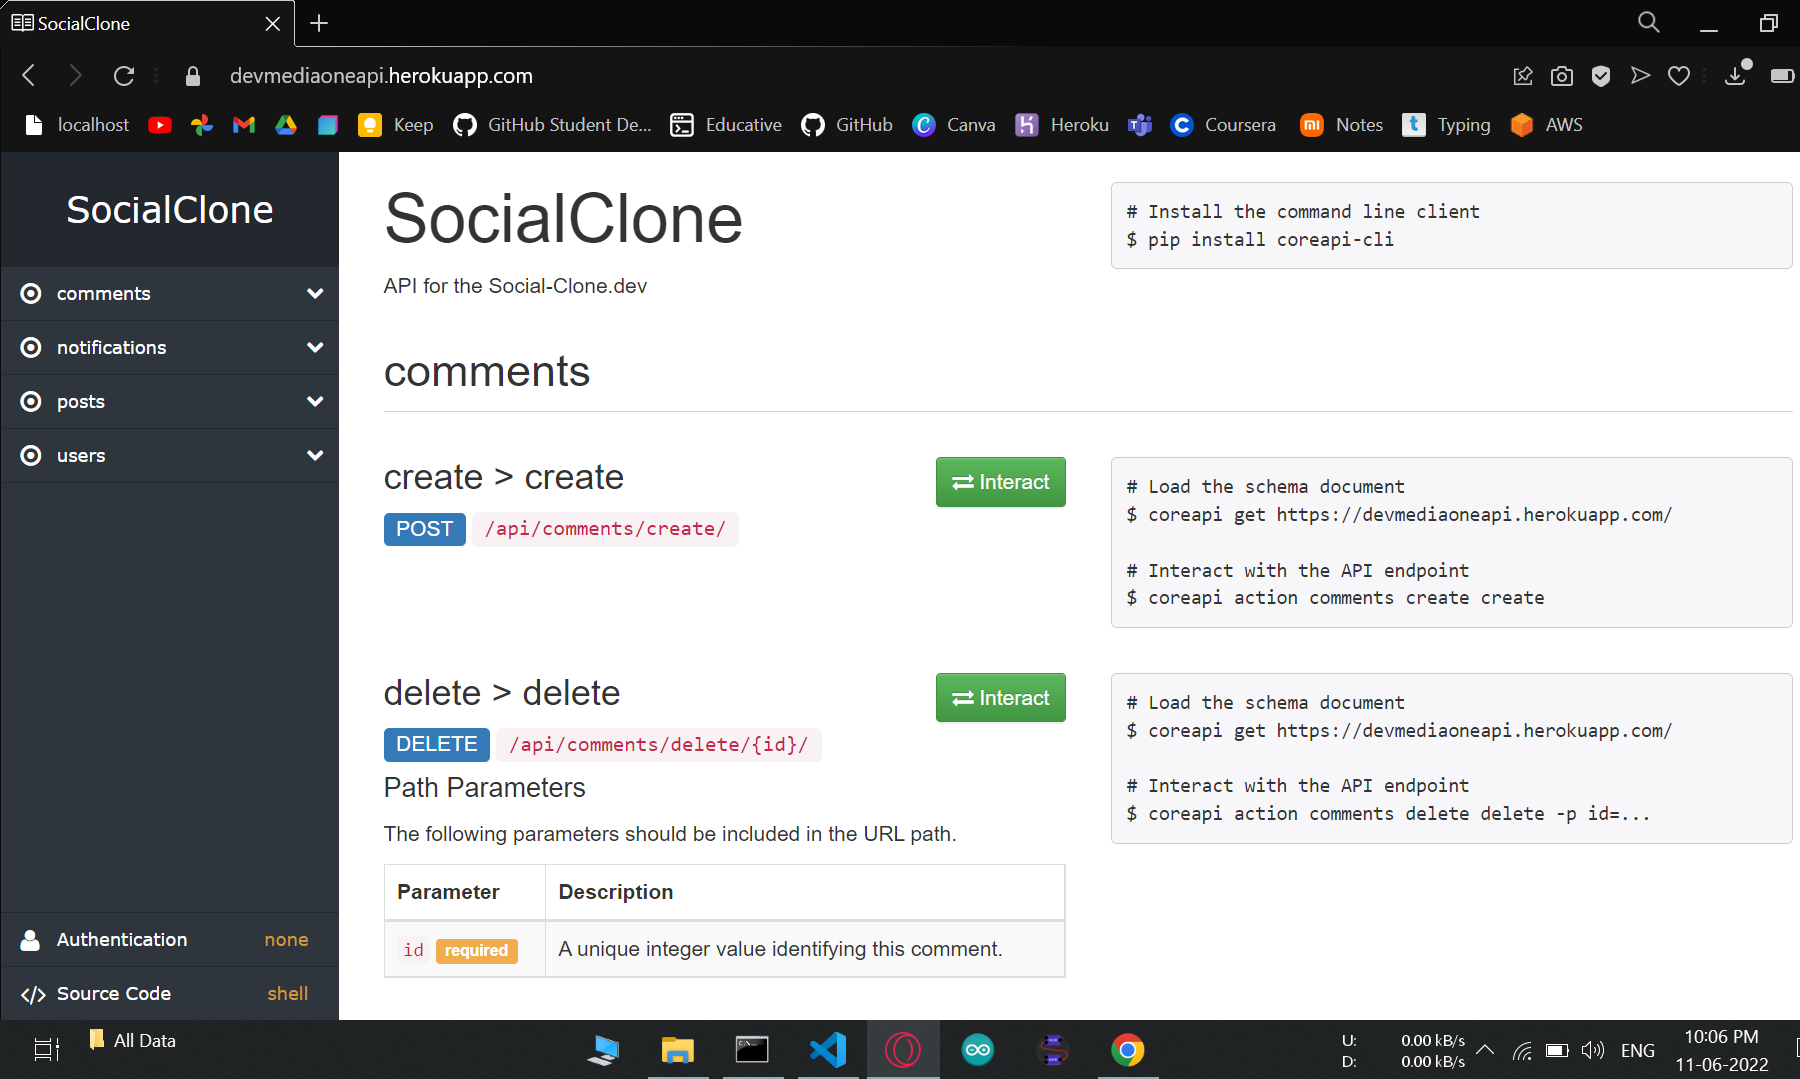
    DevMedia - Social Media Platform for Developers (Backend)

    DevMedia is a social media platform specifically designed for developers. Users can share their projects, images and threads with others.

    It includes basic features such as posting, sharing, liking, commenting, following and followers, as well as advanced features like chat, video call, and interaction.

    TechStack: Django-Rest-Framework, Channels, GraphQL, Celery, Celery-beat

    Visit Website

    View Code


    project name

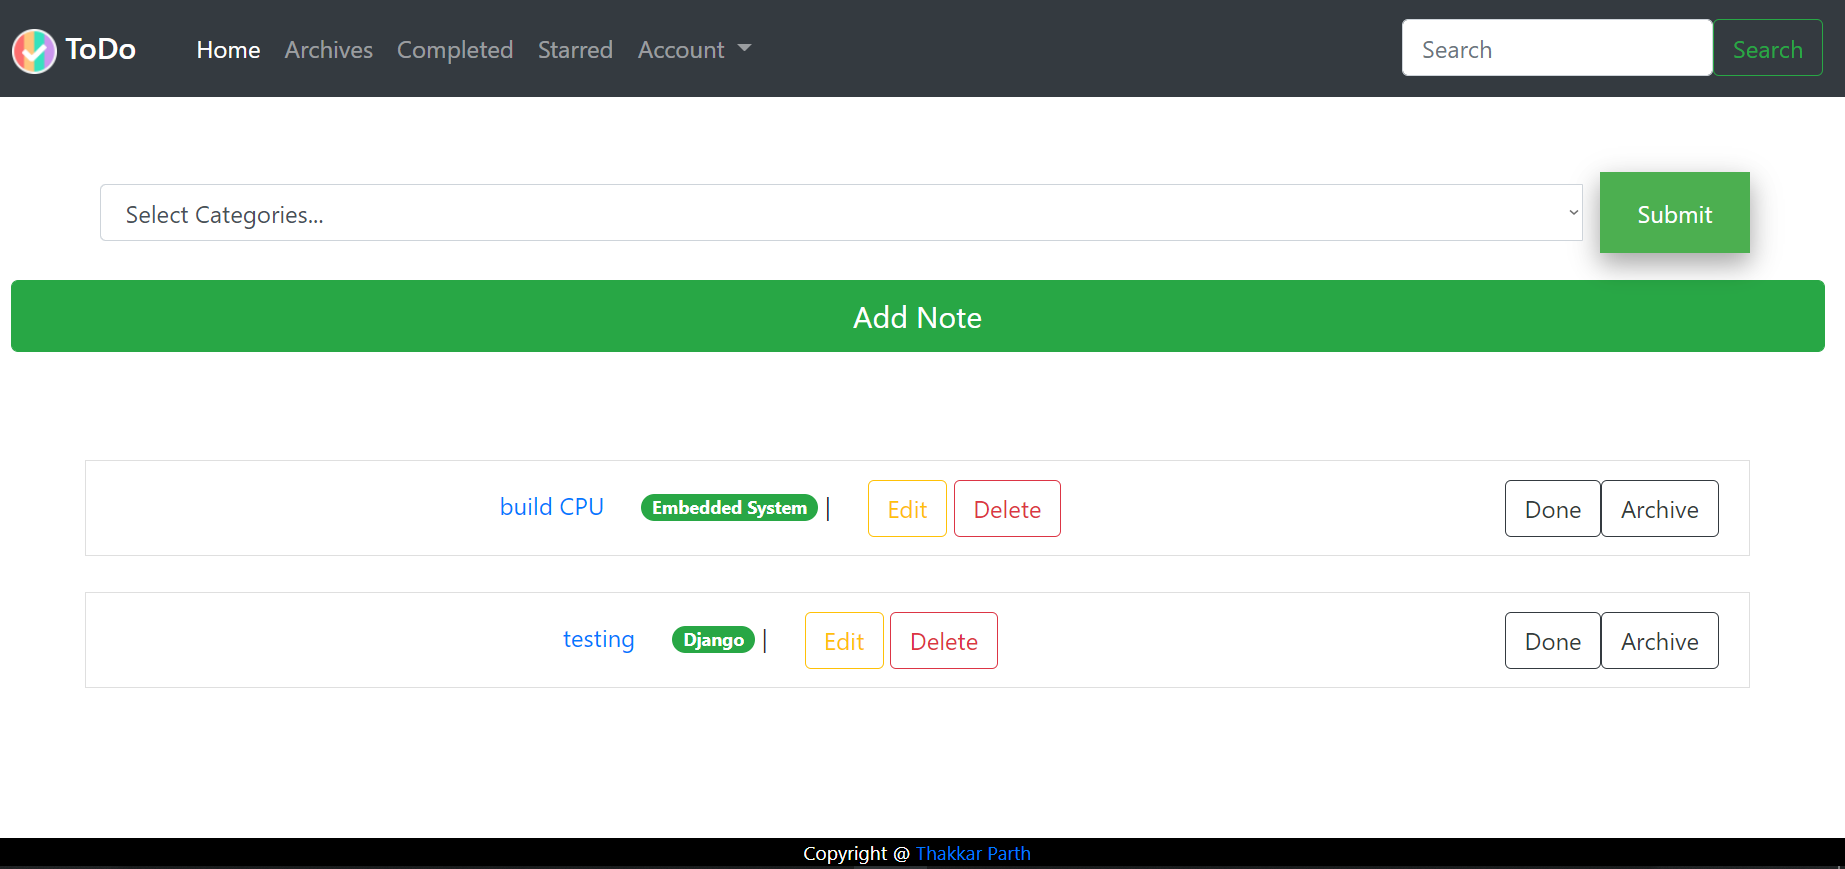
    KeeponNote - Notes Websites

    Basic Notes websites for taking notes and setting remainder using React, and Django

    I've integrated google and github profile passing

    Tech stack: React, SASS, Django

    Visit Website

    View Code


    Event QR code generator

    This system generates event passes based on the event data of the users, and sends an email to each of them. It is useful for an online pass system and can be further optimized like I have integrated complex Model for the QR code to manage huge events Fests hosted in University and It is pretty scalable. Users can upload a custom pass image and can also scan the pass on the website when scanning the passes.

    This project involved developing a comprehensive system for generating and distributing event passes, primarily designed to streamline the process for large-scale events like university fests. The system's functionality and technical implementation are as follows:
    Event Pass Generation:

    The system automatically generates personalized event passes based on the provided user data. This process includes creating a unique identifier for each attendee, which is crucial for managing large crowds and ensuring event security.


    QR Code Integration:

    A complex model for QR codes has been integrated into each pass. This feature is especially useful for handling high volumes of attendees, as it allows for quick and efficient verification at entry points. The QR codes contain encrypted data about the attendee, enhancing the security and efficiency of the check-in process.


    Custom Pass Design and Upload:

    Users have the flexibility to upload custom designs for their passes. This feature adds a personalized touch to the event experience and caters to the specific branding or thematic needs of different events.


    Email Distribution:

    Once the passes are generated, the system automatically sends them to attendees via email. This electronic distribution method is not only environmentally friendly but also ensures that attendees receive their passes promptly and securely.


    Pass Scanning and Verification:

    The website includes a functionality for scanning passes. Attendees can have their QR code-based passes scanned directly from their mobile devices, streamlining the entry process. This scanning system is integrated into the website for ease of access and use during the event.


    Use Case and Scalability:

    The system was successfully deployed for all events hosted last year at LD College of Engineering, demonstrating its effectiveness and scalability. Its ability to handle large numbers of attendees and multiple events simultaneously showcases its robustness.


    Technology Stack:

    The system is built using Django, which provides a solid and flexible backend framework. Ajax is used for asynchronous data communication, enhancing the responsiveness of the web application. Sockets are implemented for real-time communication, crucial for instant pass verification and data updates. WebRTC is utilized for the pass scanning feature, enabling real-time video capture for QR code scanning directly from the website.

    This event pass system represents a significant advancement in managing and conducting large-scale events. Its integration of QR codes, custom pass design, and efficient distribution and verification mechanisms make it a versatile and user-friendly solution. The successful implementation at a university level underscores its potential for broader applications in various event management scenarios.

    This app was used in all of the last year events hosted in my college(LD college of engineering)

    Tech stack: Django, Ajax, Sockets, WebRTC

    View Code

    Other Projects

    IoT Home Automation with telegram

    In this project i've integrated telegram website and ESP8266 board, For real time operation i've automated home lights and fans. This telegram bot is scalable

    View Code

    Simple Notepad using C++

    Created Simple notepad like text editor using C++

    View Code


    Small Projects

    Visit my github for more projects

    More on GitHub

    My GitHub

    Contact Me !

    Do you have any questions? Please do not hesitate to contact me directly.


    • Boulder, CO

    • +1 (303) 548 9344

    • parthishere1234@gmail.com